Set Up Your Firebase Server
Before your participants can start using Well Ping, you have to set up a server that will store your study file (e.g., the questions) as well as the participants’ responses.
Luckily, setting up a server is very simple. Well Ping is designed to use Google’s popular Firebase platform. Specifically, Well Ping is utilizing Firebase Authentication (for authenticating the participant) and Firebase Realtime Database (for storing the participants’ responses). You may wish to review “Privacy and Security in Firebase”, “Terms of Service for Firebase Services”, and “Pricing” for relevent services (Firebase Authentication and Firebase Realtime Database) before continuing. You may also want to learn more about Well Ping’s Privacy & Security.
Optionally, you may also choose to host your study file as well as your (optional) dashboard using Firebase Hosting (although you are free to choose other platforms such as GitHub Pages).
Let’s get started!
1. Create a Firebase Project
A Firebase project is basically a dedicated entity for a single project - in this case, your study. To create a new Firebase project, follow Step 1: Create a Firebase project.
Some notes:
- You may use any Project name and Project ID you like.
- You do not have to enable the optional Google Analytics for the project.
At this point, you should be on a dashboard page like this:
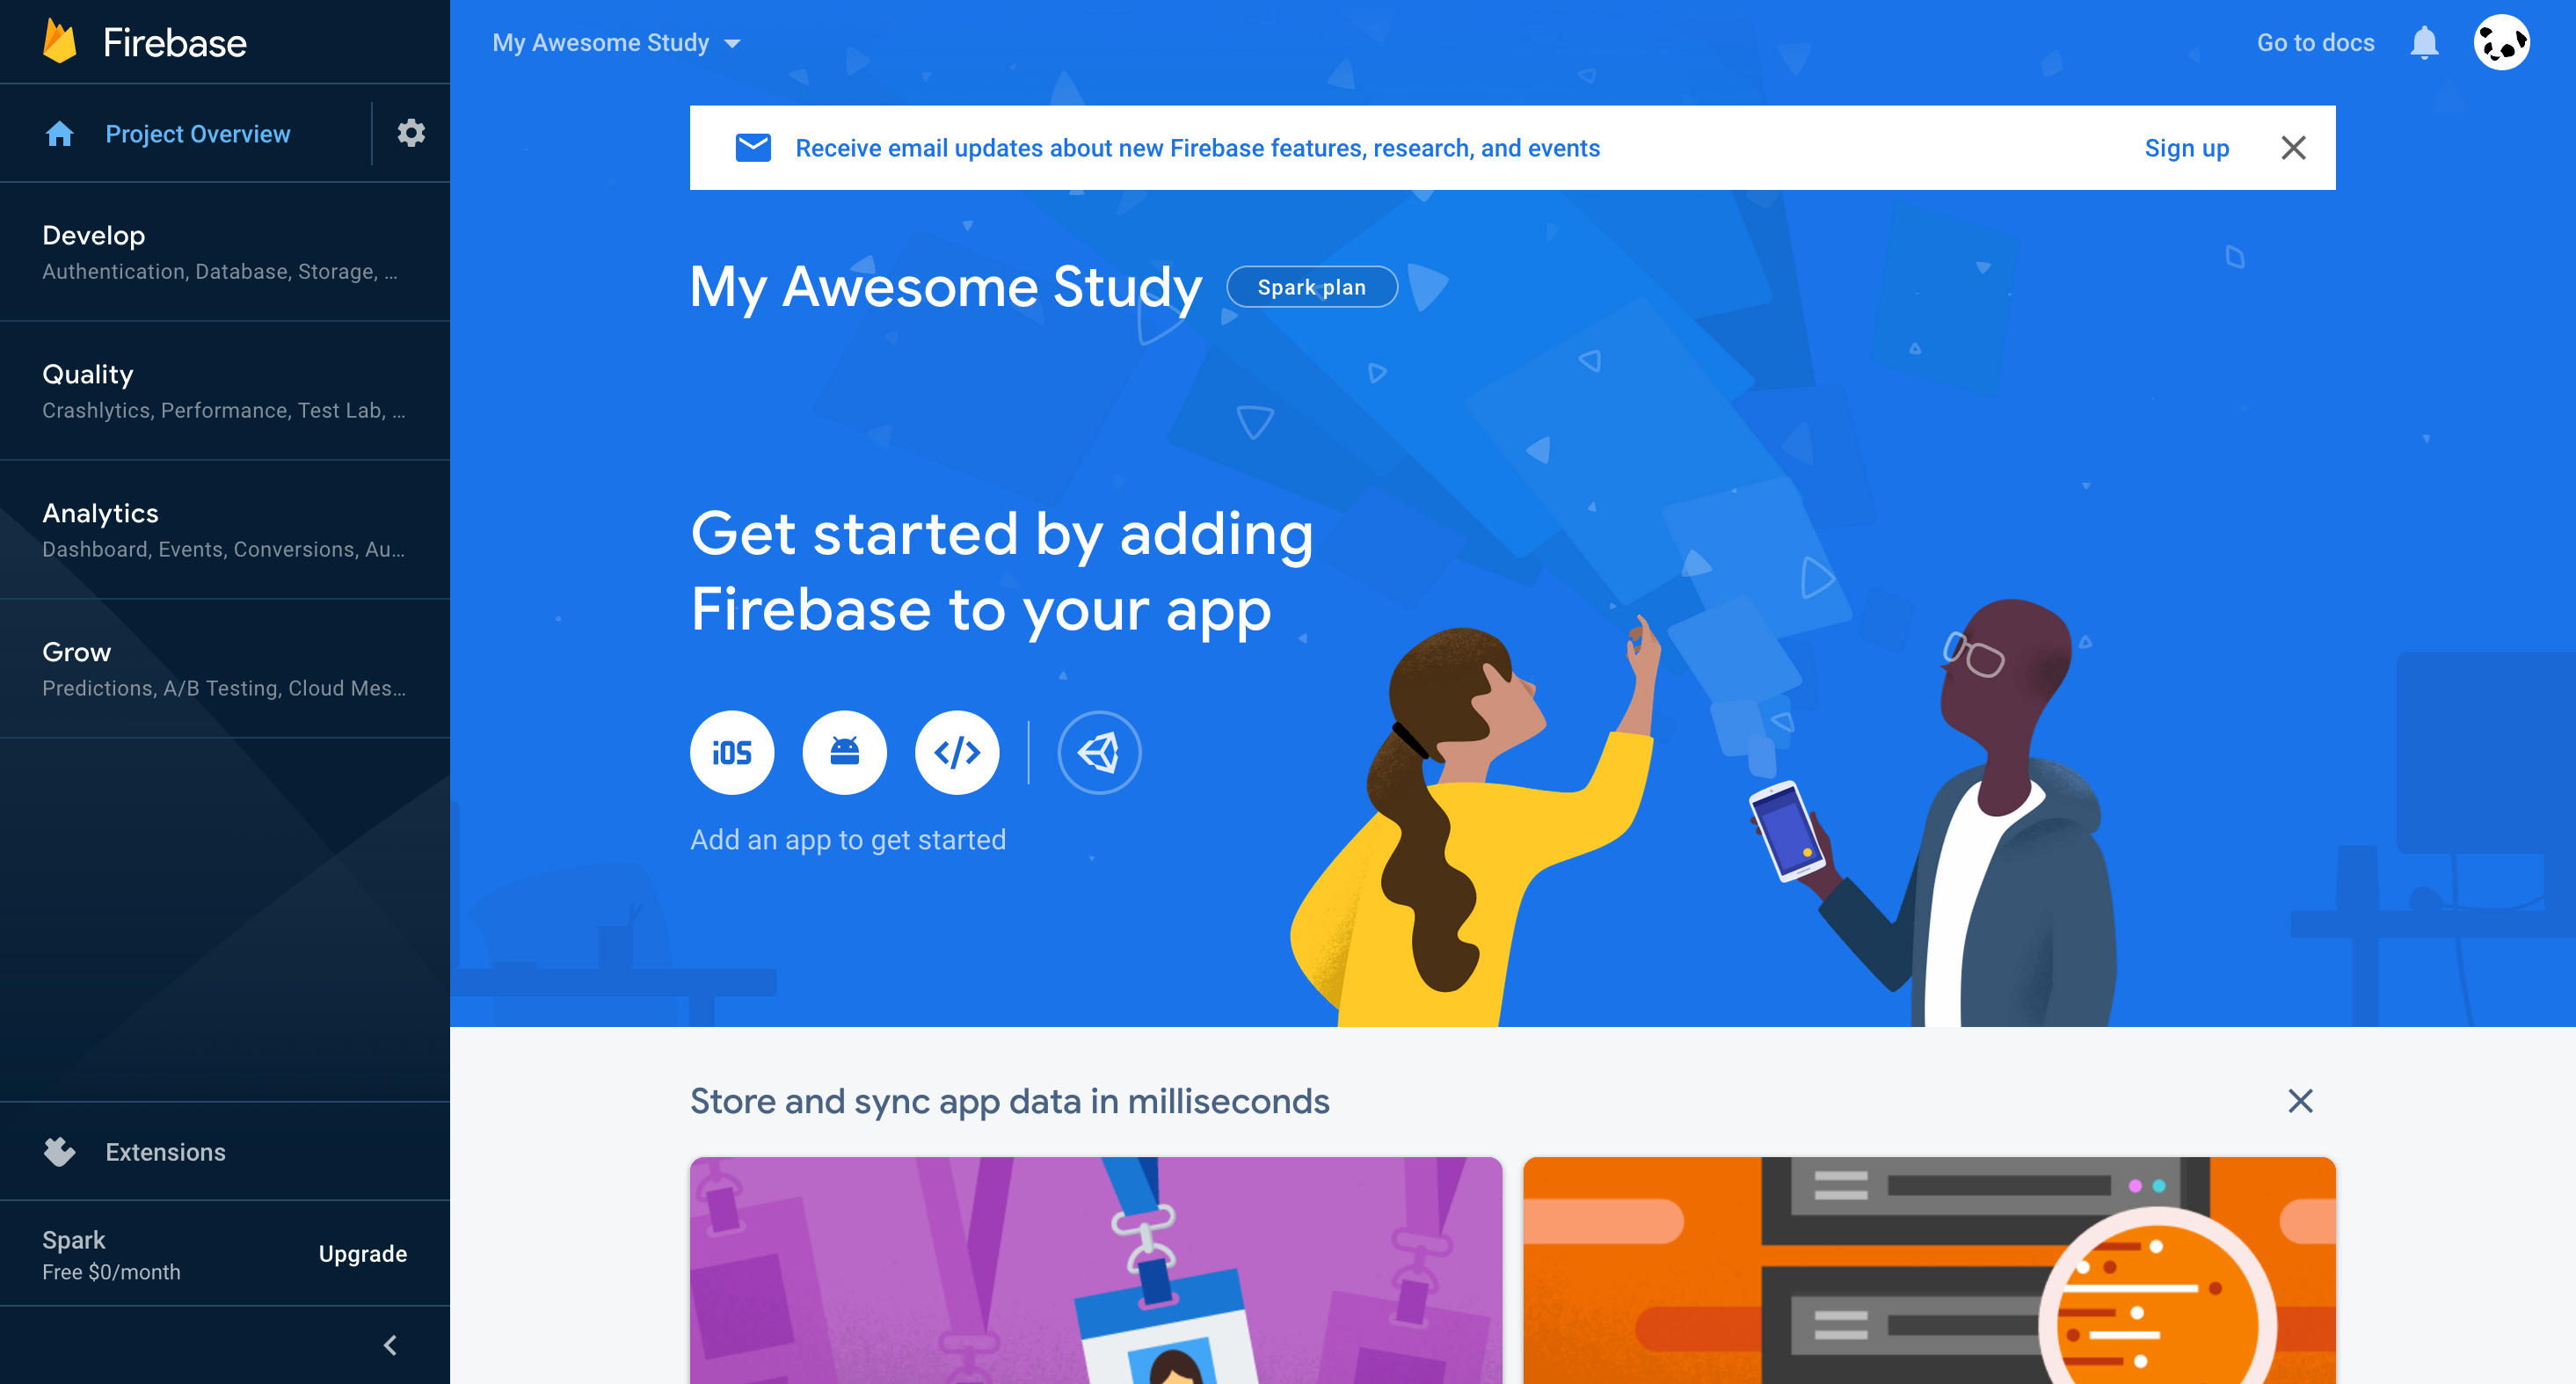
Now you have successfully created a Firebase project!
2. Set Up Participants
Now we need to generate a list of username/password combinations for the participants (which we will refer to as “users” from now on).
2.1. Enable sign-in method
In the Firebase console, navigate to “Develop” → “Authentication” on the left. This is where we manage Firebase Auth, the service that helps us authenticate the users. As expected, we see no user currently.
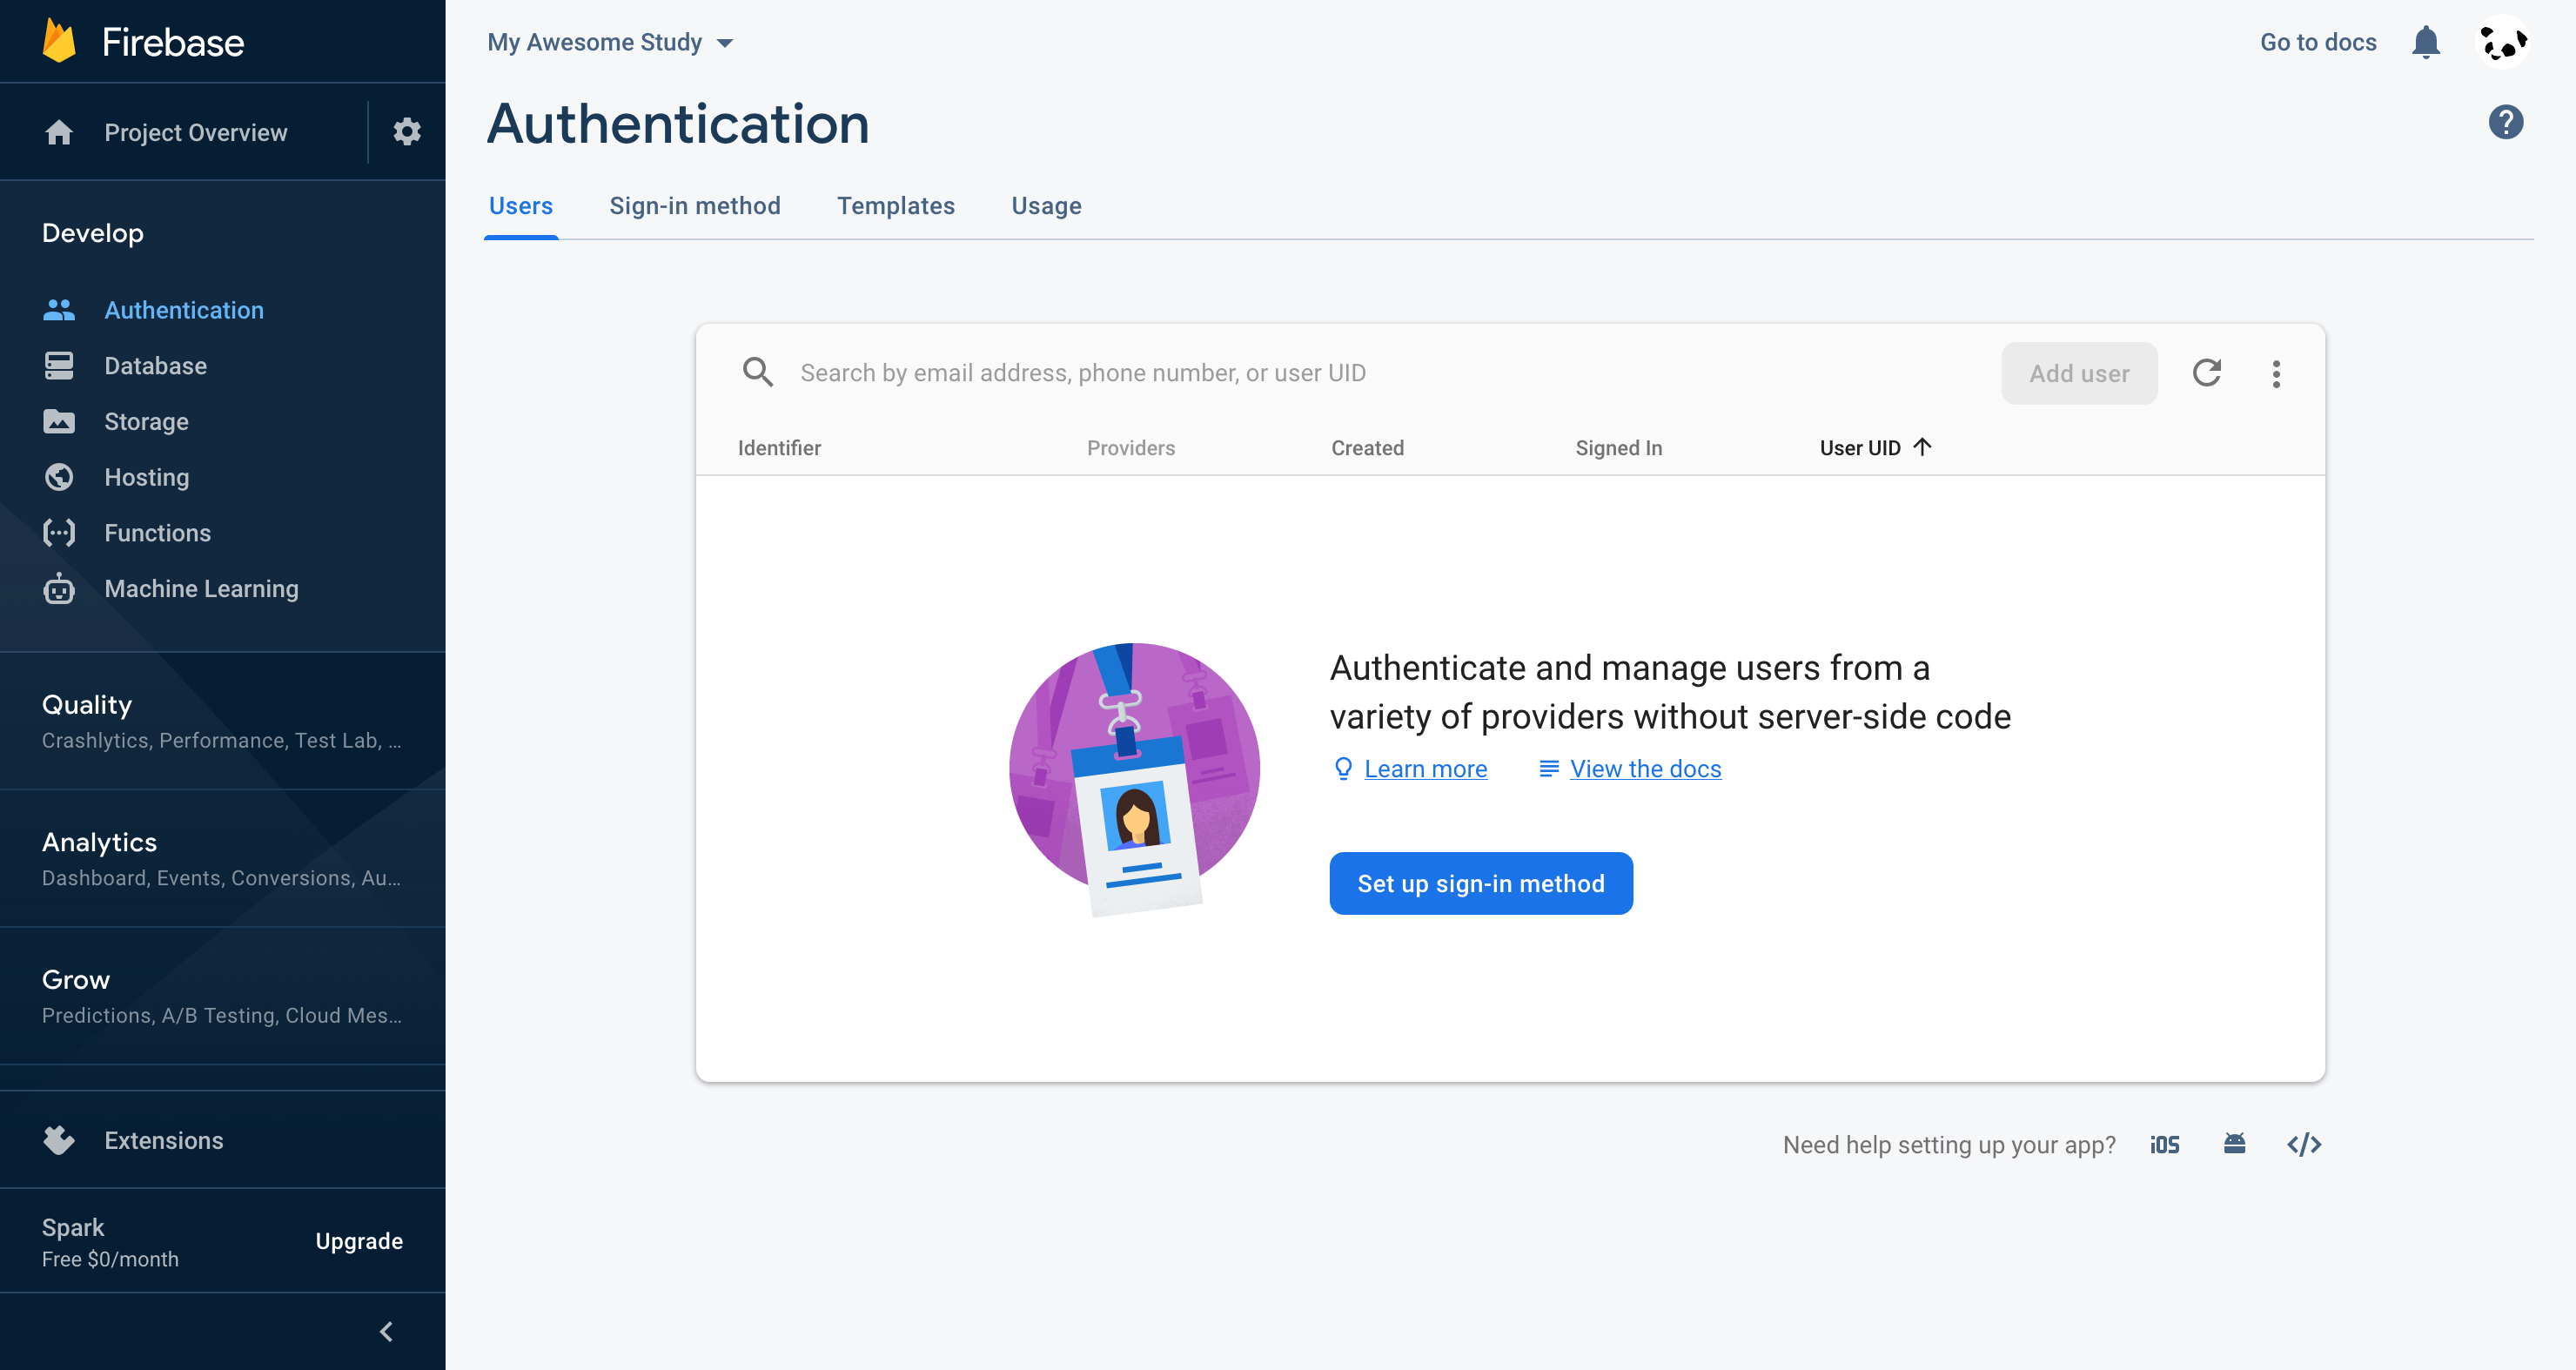
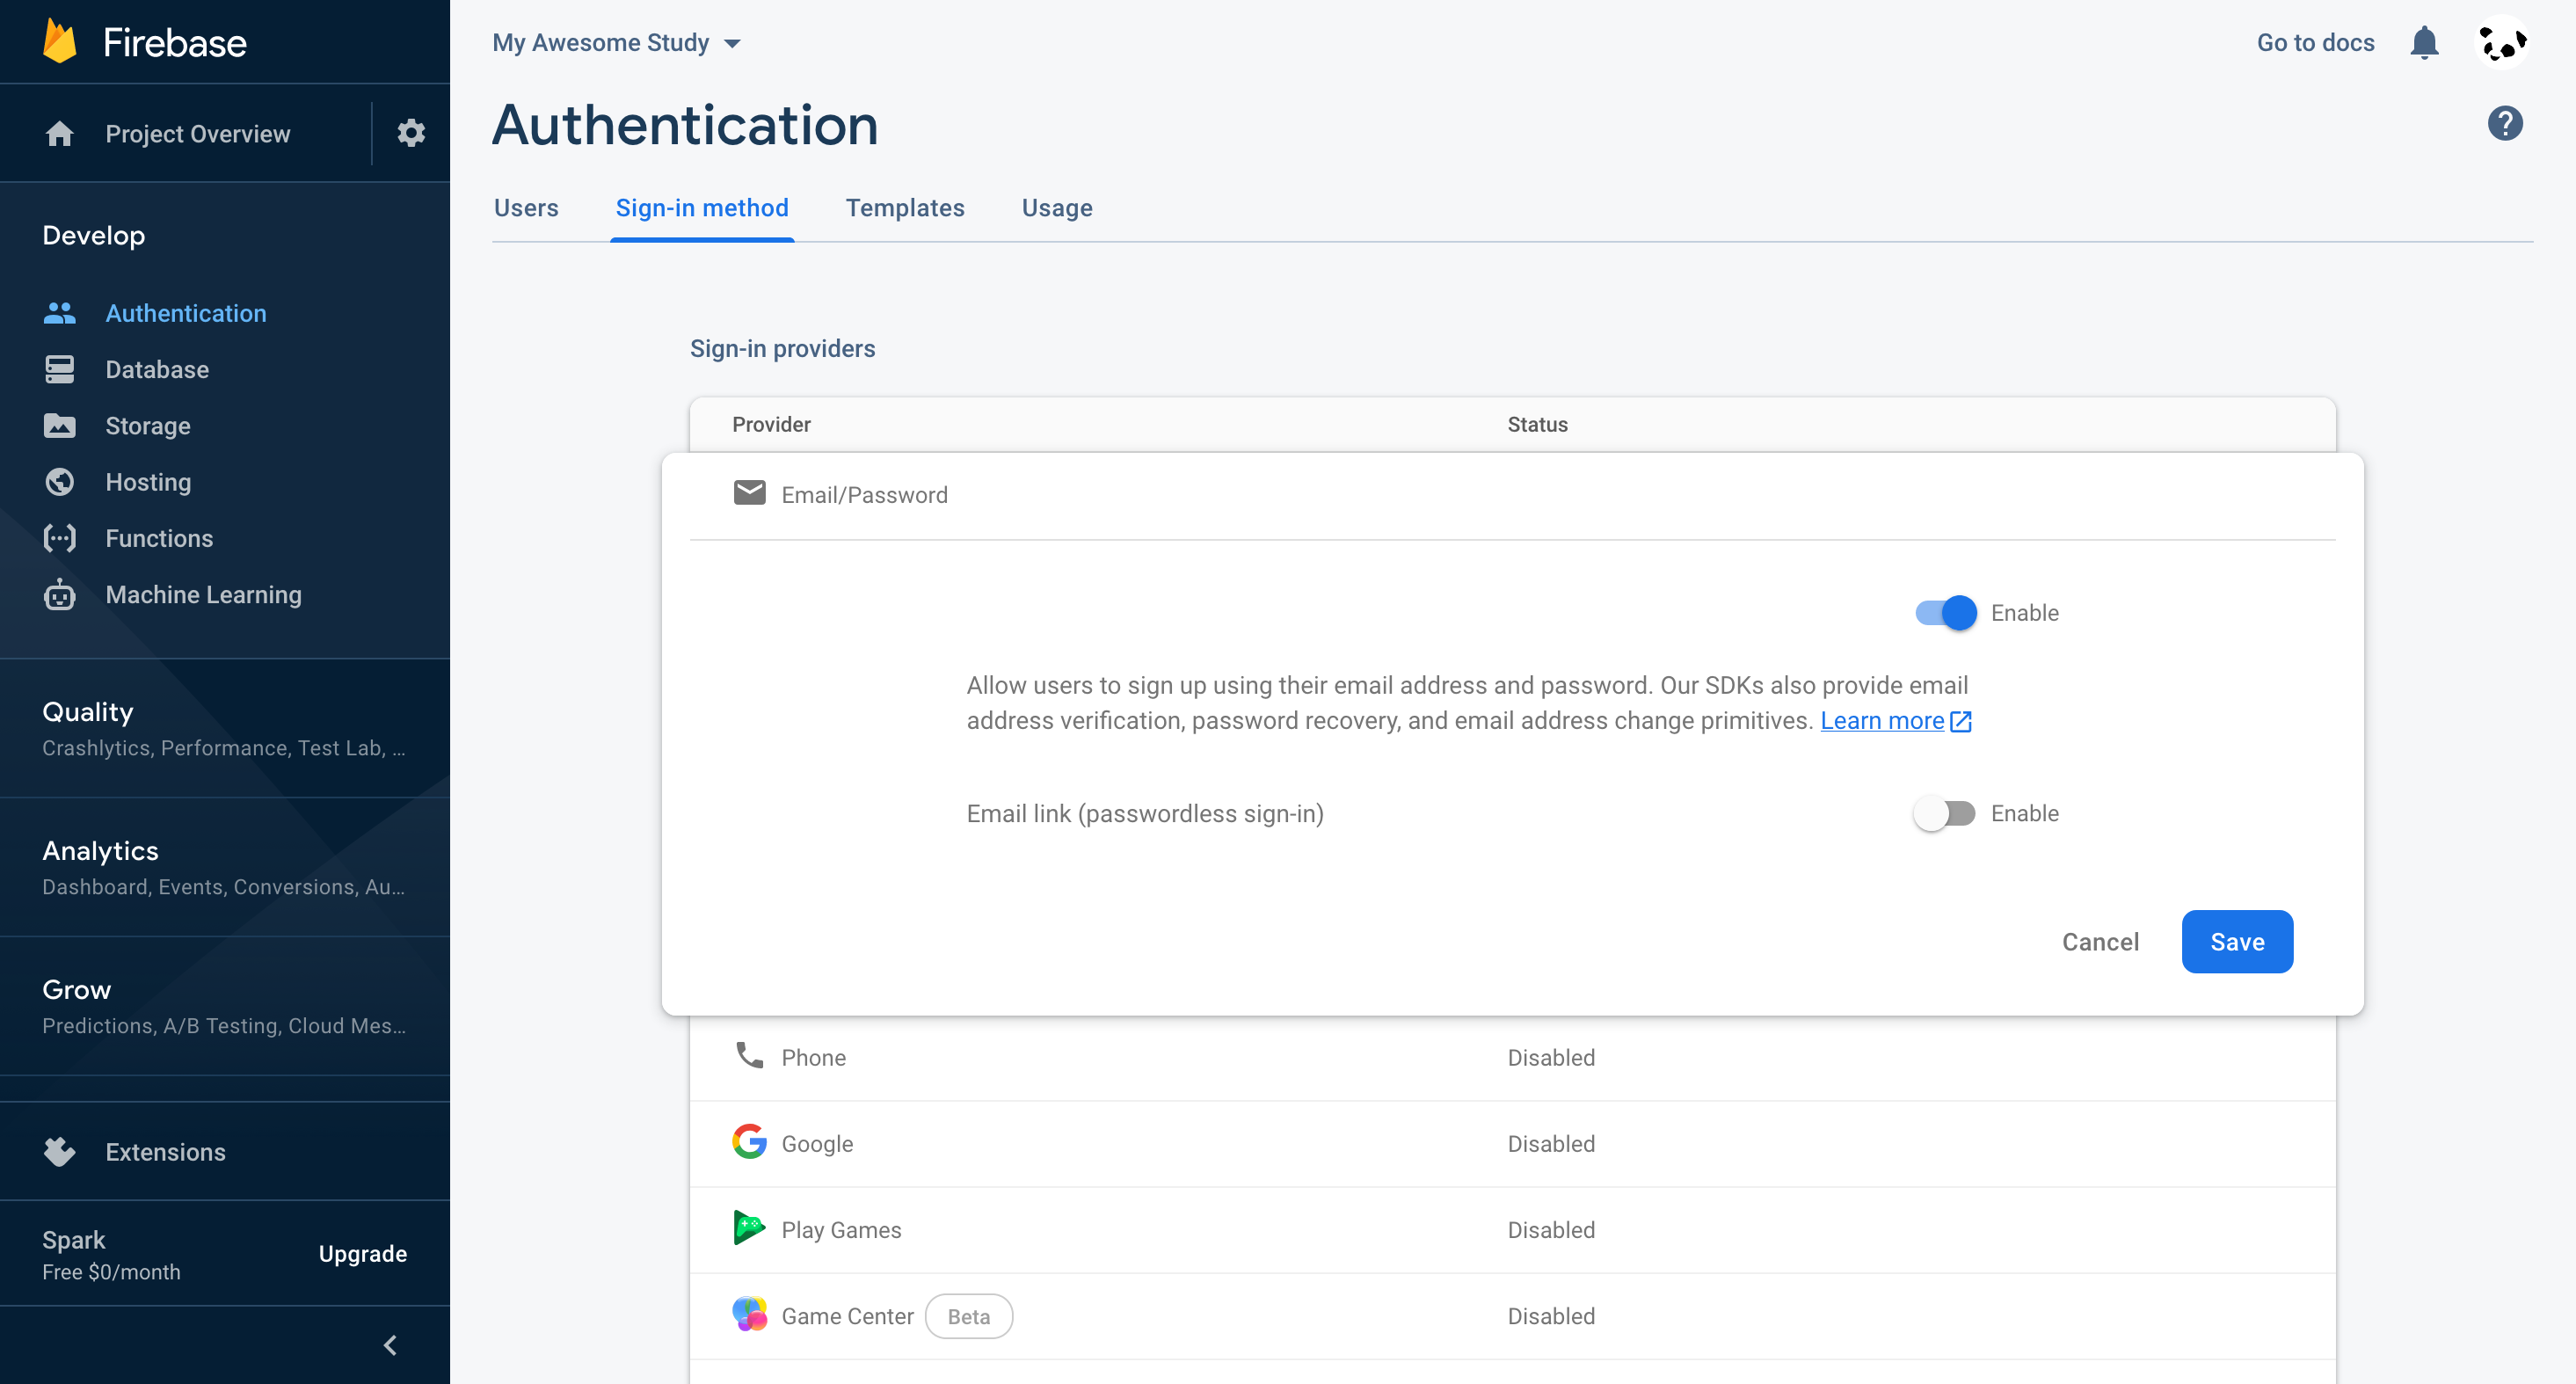
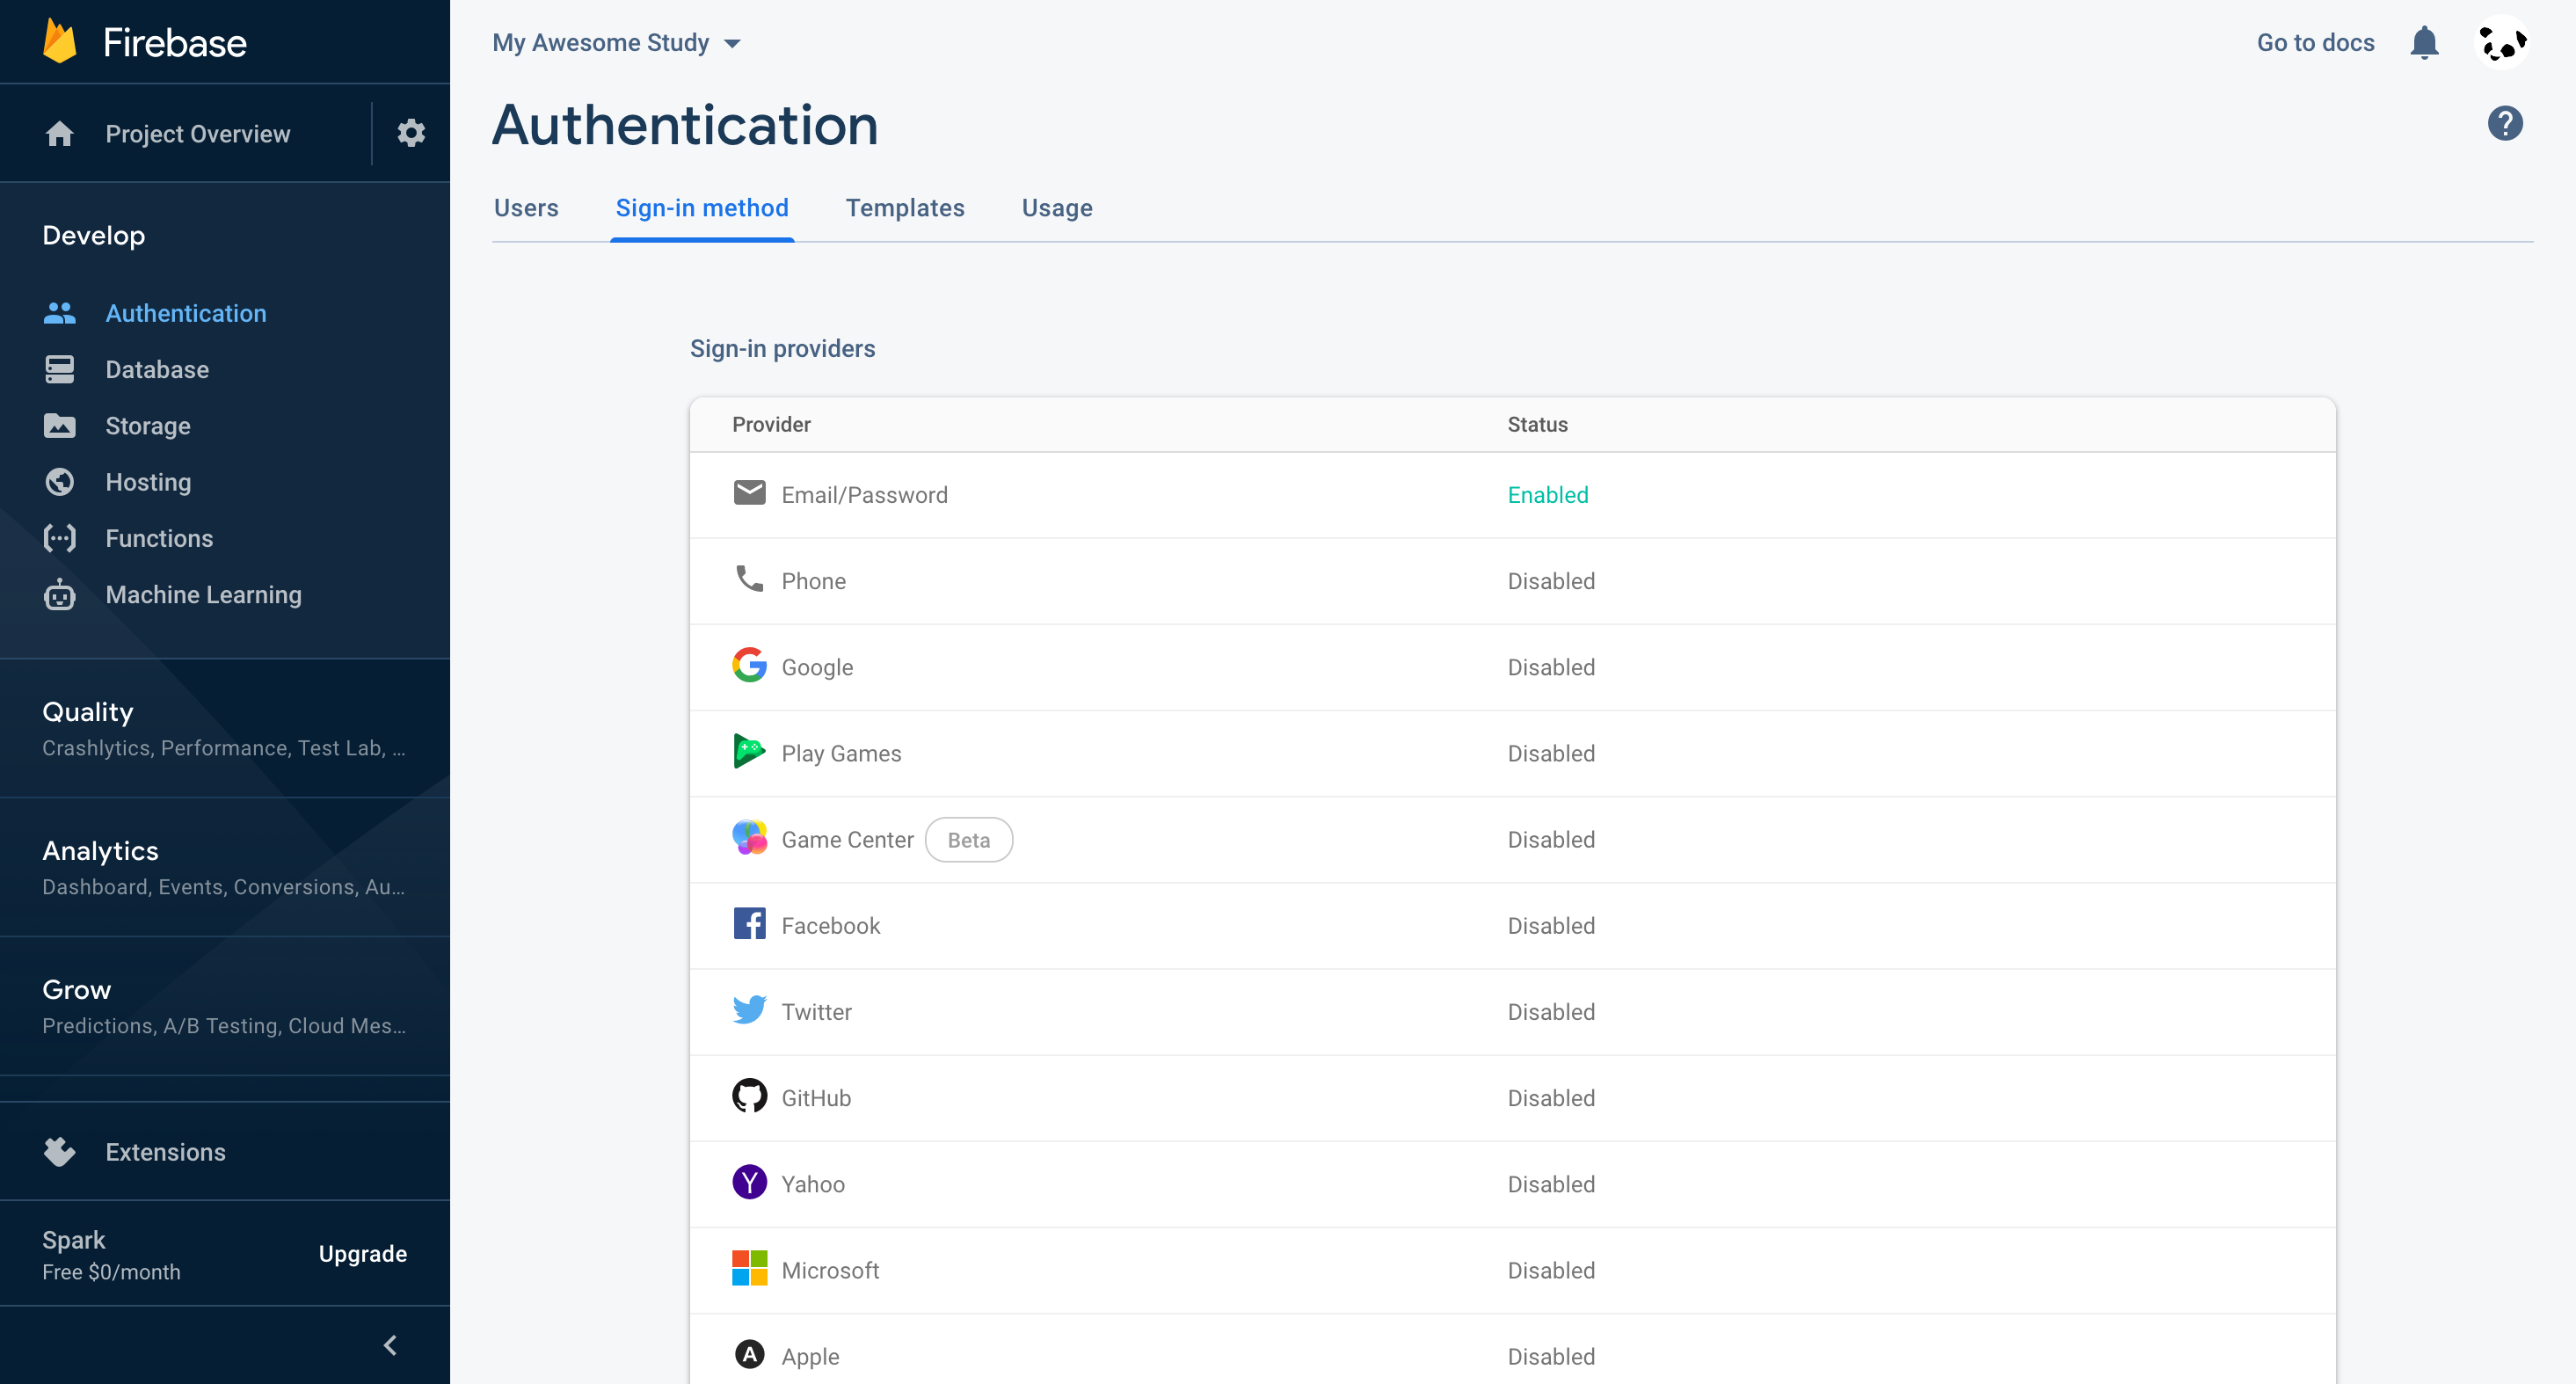
We need to allow the user to sign in with username/password combinations. To do so, go to the “Sign-in method” tab and enable the “Email/Password” provider.
You might curious why we are using Email/Password provider when we are just providing the users username/password combinations (there’s no email!). You can read more about it here.
2.2. Install Firebase CLI
Because we want to import a list of username/password combinations to Firebase Auth, you will have to install Firebase CLI first. Please follow https://firebase.google.com/docs/cli#install_the_firebase_cli to install Firebase CLI in your system.
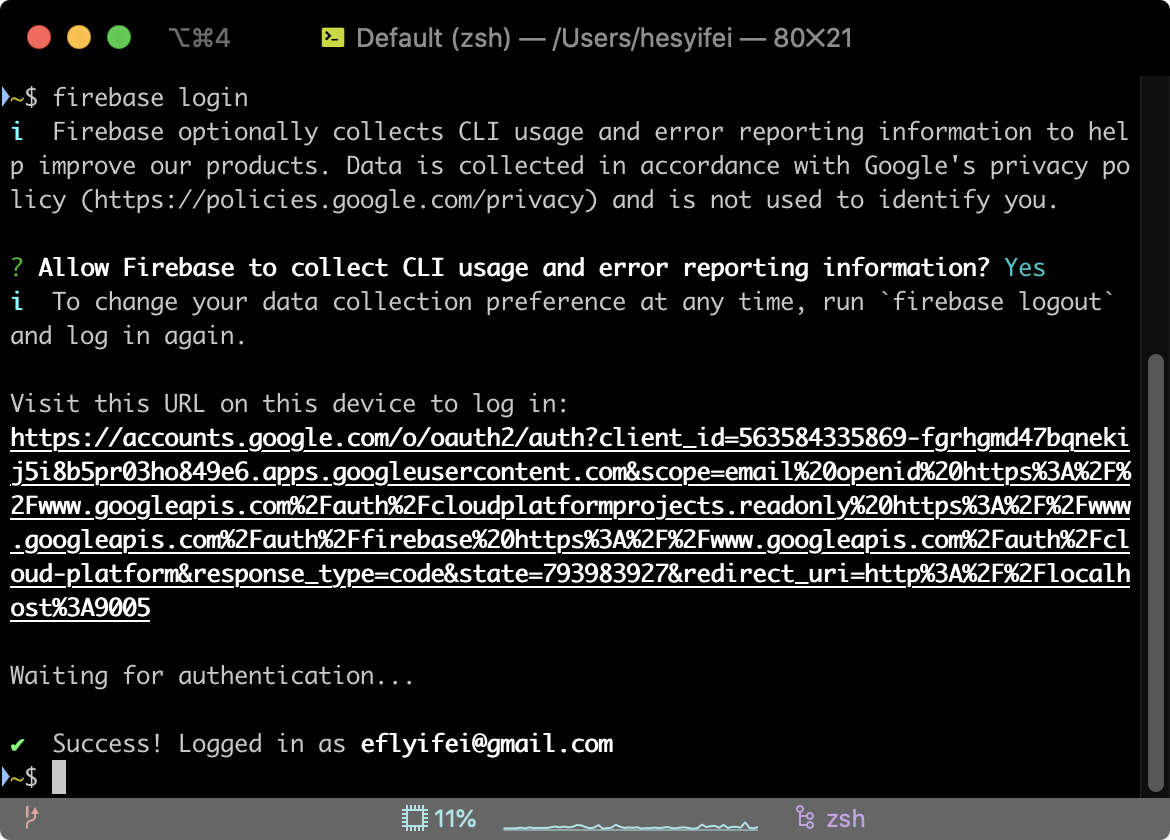
After installing Firebase CLI, please follow https://firebase.google.com/docs/cli#sign-in-test-cli to log into Firebase in Firebase CLI.
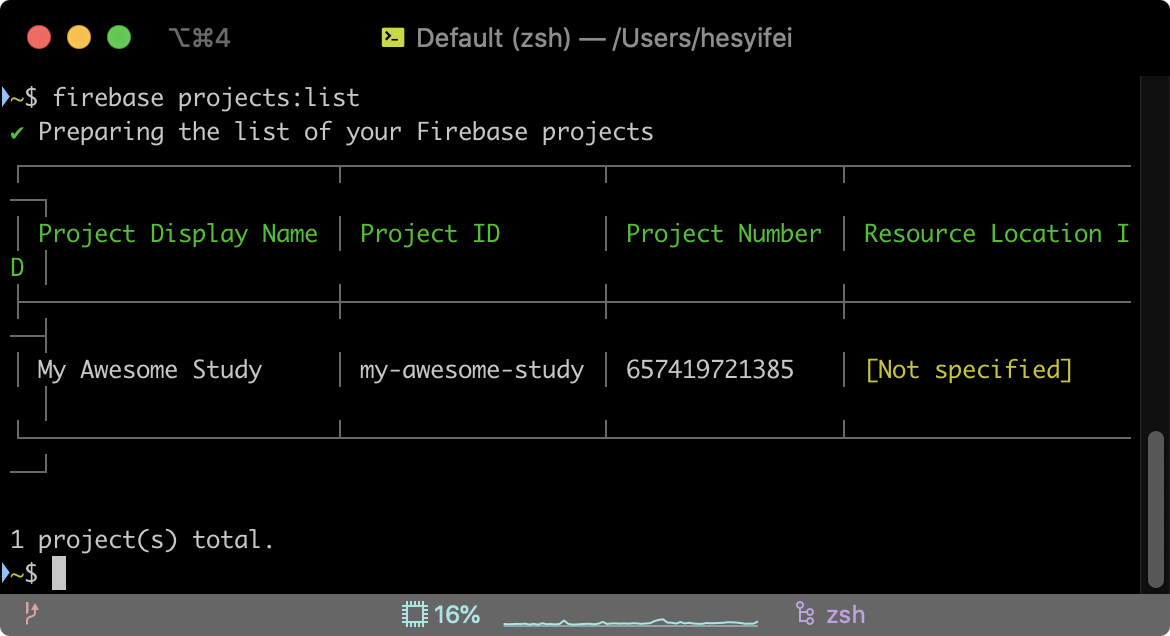
At this point, if you run firebase projects:list, you should see the Firebase project you just created in the list. You should note down the “Project ID” (in this case, it’s my-awesome-study) as we will use it later.
2.3. Generate username/password combinations
Then, let’s generate a list of username/password combinations by using the tool below.
After you enter the number of users to generate and click “Generate”, you should see two buttons (“Download the CSV file for Firebase import” and “Download the CSV file containing username/password combinations (for your reference)”). You should click both buttons and download the two CSV files.
It might make sense for you to generate some extra user accounts for your own testing purposes.
Username/Password Combinations Generator
Now on your computer, you should have downloaded two CSV files: import_to_firebase_auth.csv and users.csv.
Both files contain the same set of user information.
The users.csv is for your own reference. The first column is the usernames and the second column is the passwords.
The import_to_firebase_auth.csv is the file that we will use to import these users to Firebase Auth.
2.4. Import the username/password combinations
This is the most technical step you will have to do. Everything after this is much less technical.
Open your terminal, and run the following command (replace <PATH TO import_to_firebase_auth.csv> with the path to your import_to_firebase_auth.csv; replace <YOUR PROJECT ID> with your project ID noted above in Step 2.1):
firebase auth:import <PATH TO import_to_firebase_auth.csv> --project <YOUR PROJECT ID> --hash-algo=BCRYPT
For example, my import_to_firebase_auth.csv is stored in /Users/hesyifei/Downloads/import_to_firebase_auth.csv and my project ID is my-awesome-study. So I will run the following command:
firebase auth:import /Users/hesyifei/Downloads/import_to_firebase_auth.csv --project my-awesome-study --hash-algo=BCRYPT
Notice that on Mac, you could drag a file inside the terminal to automatically append the path of the file to the current command.
After running the command, you should see something like this:

2.5. Verify import
Back in the Firebase console, navigate to “Develop” → “Authentication”, and you should see the imported list of users here.
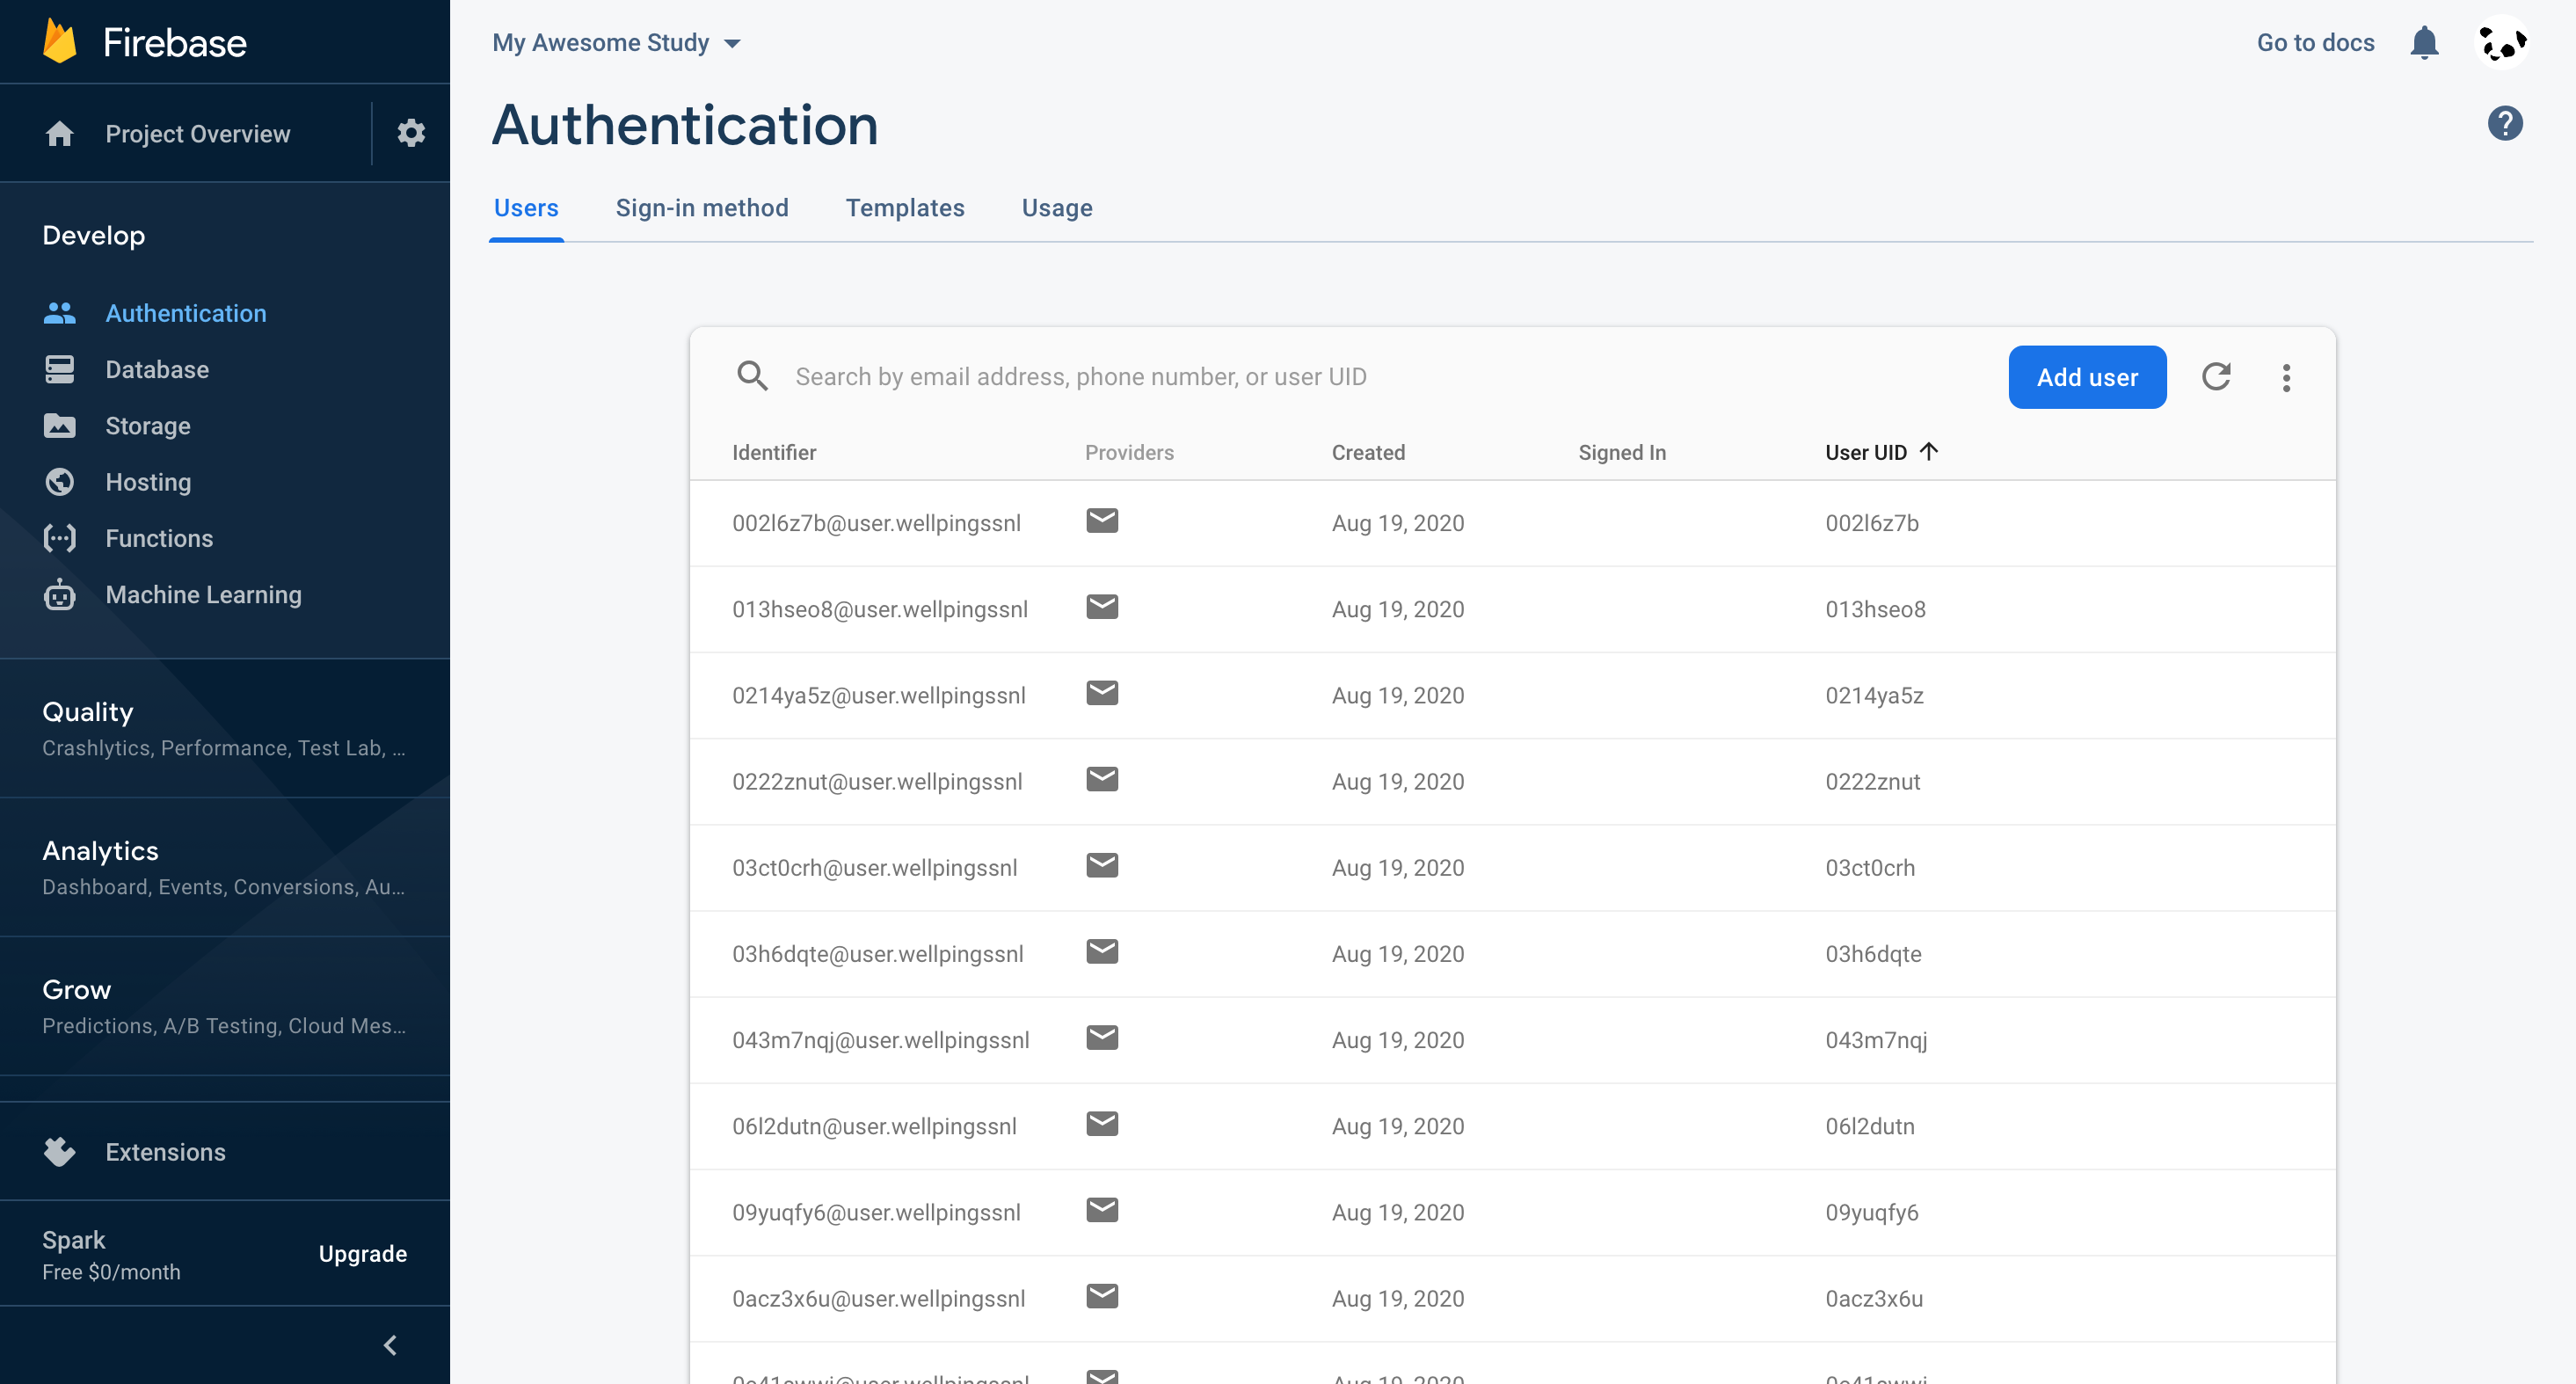
Congratulations! You have successfully imported the users.
3. Set Up Database
We will also have to set up some security rules for the Firebase Realtime Database so that an user will not have access to data other than their own responses.
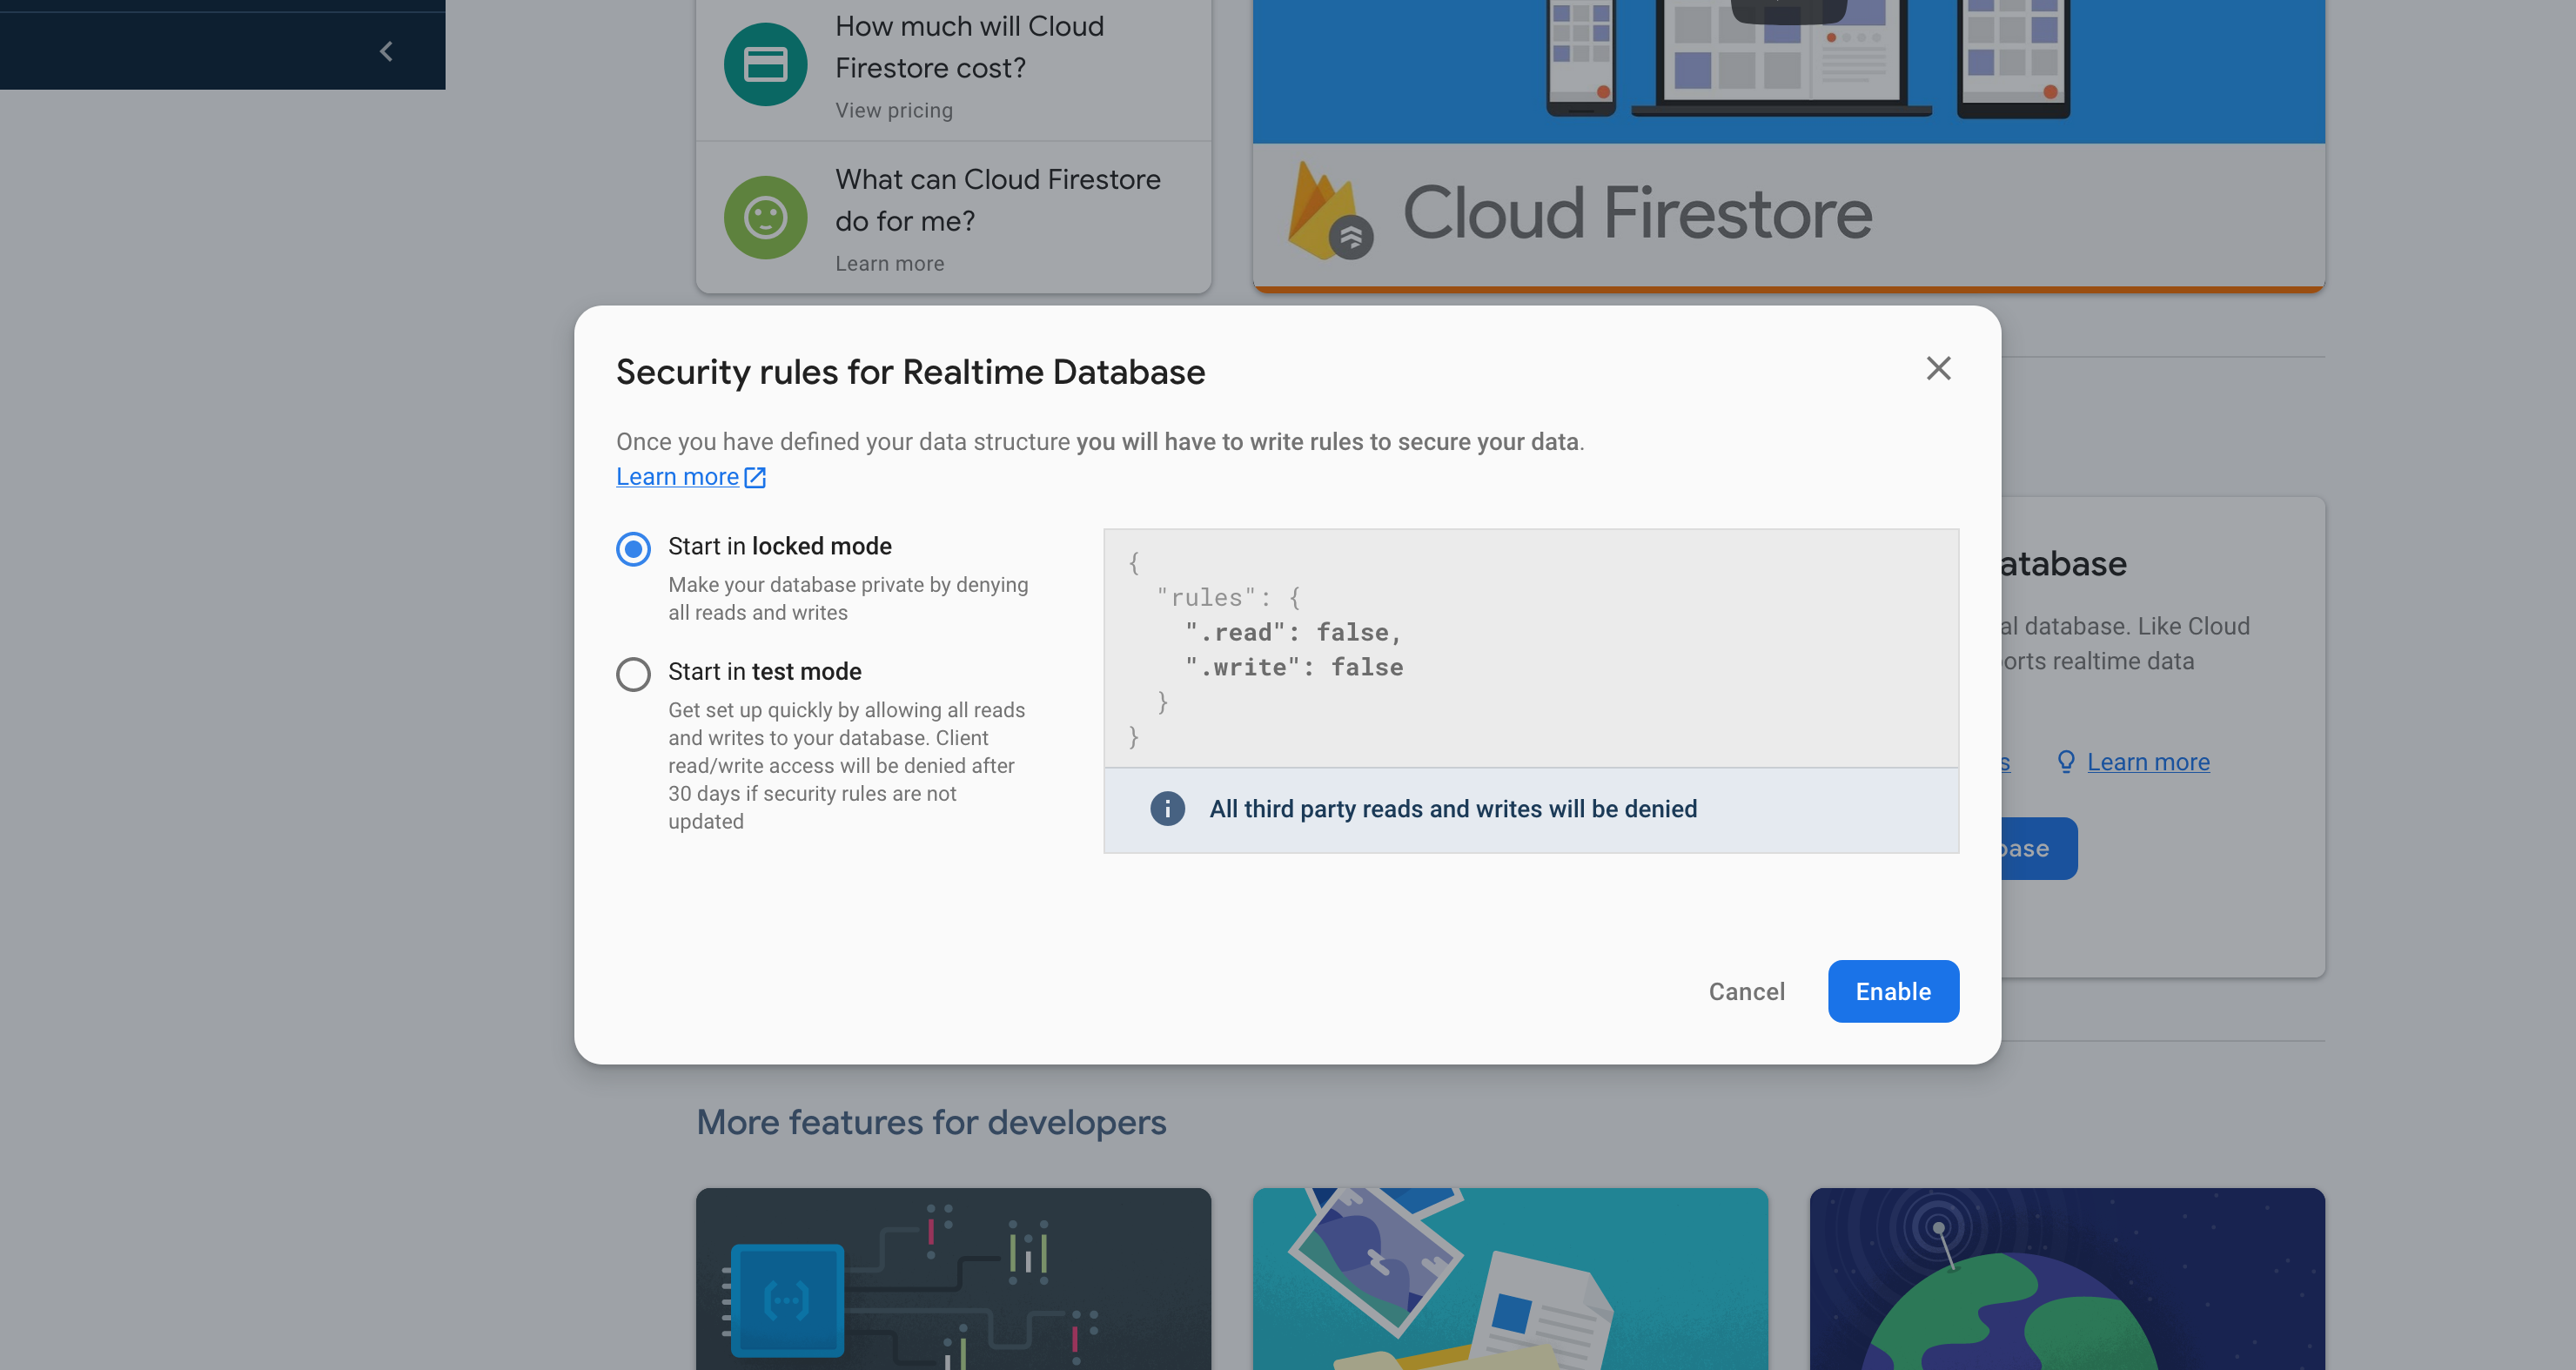
To do so, navigate to “Develop” → “Database” on the left. This is where we manage Firebase Realtime Database, the service that helps us store the user responses. Scroll down to “Or choose Realtime Database” and click “Create database”.
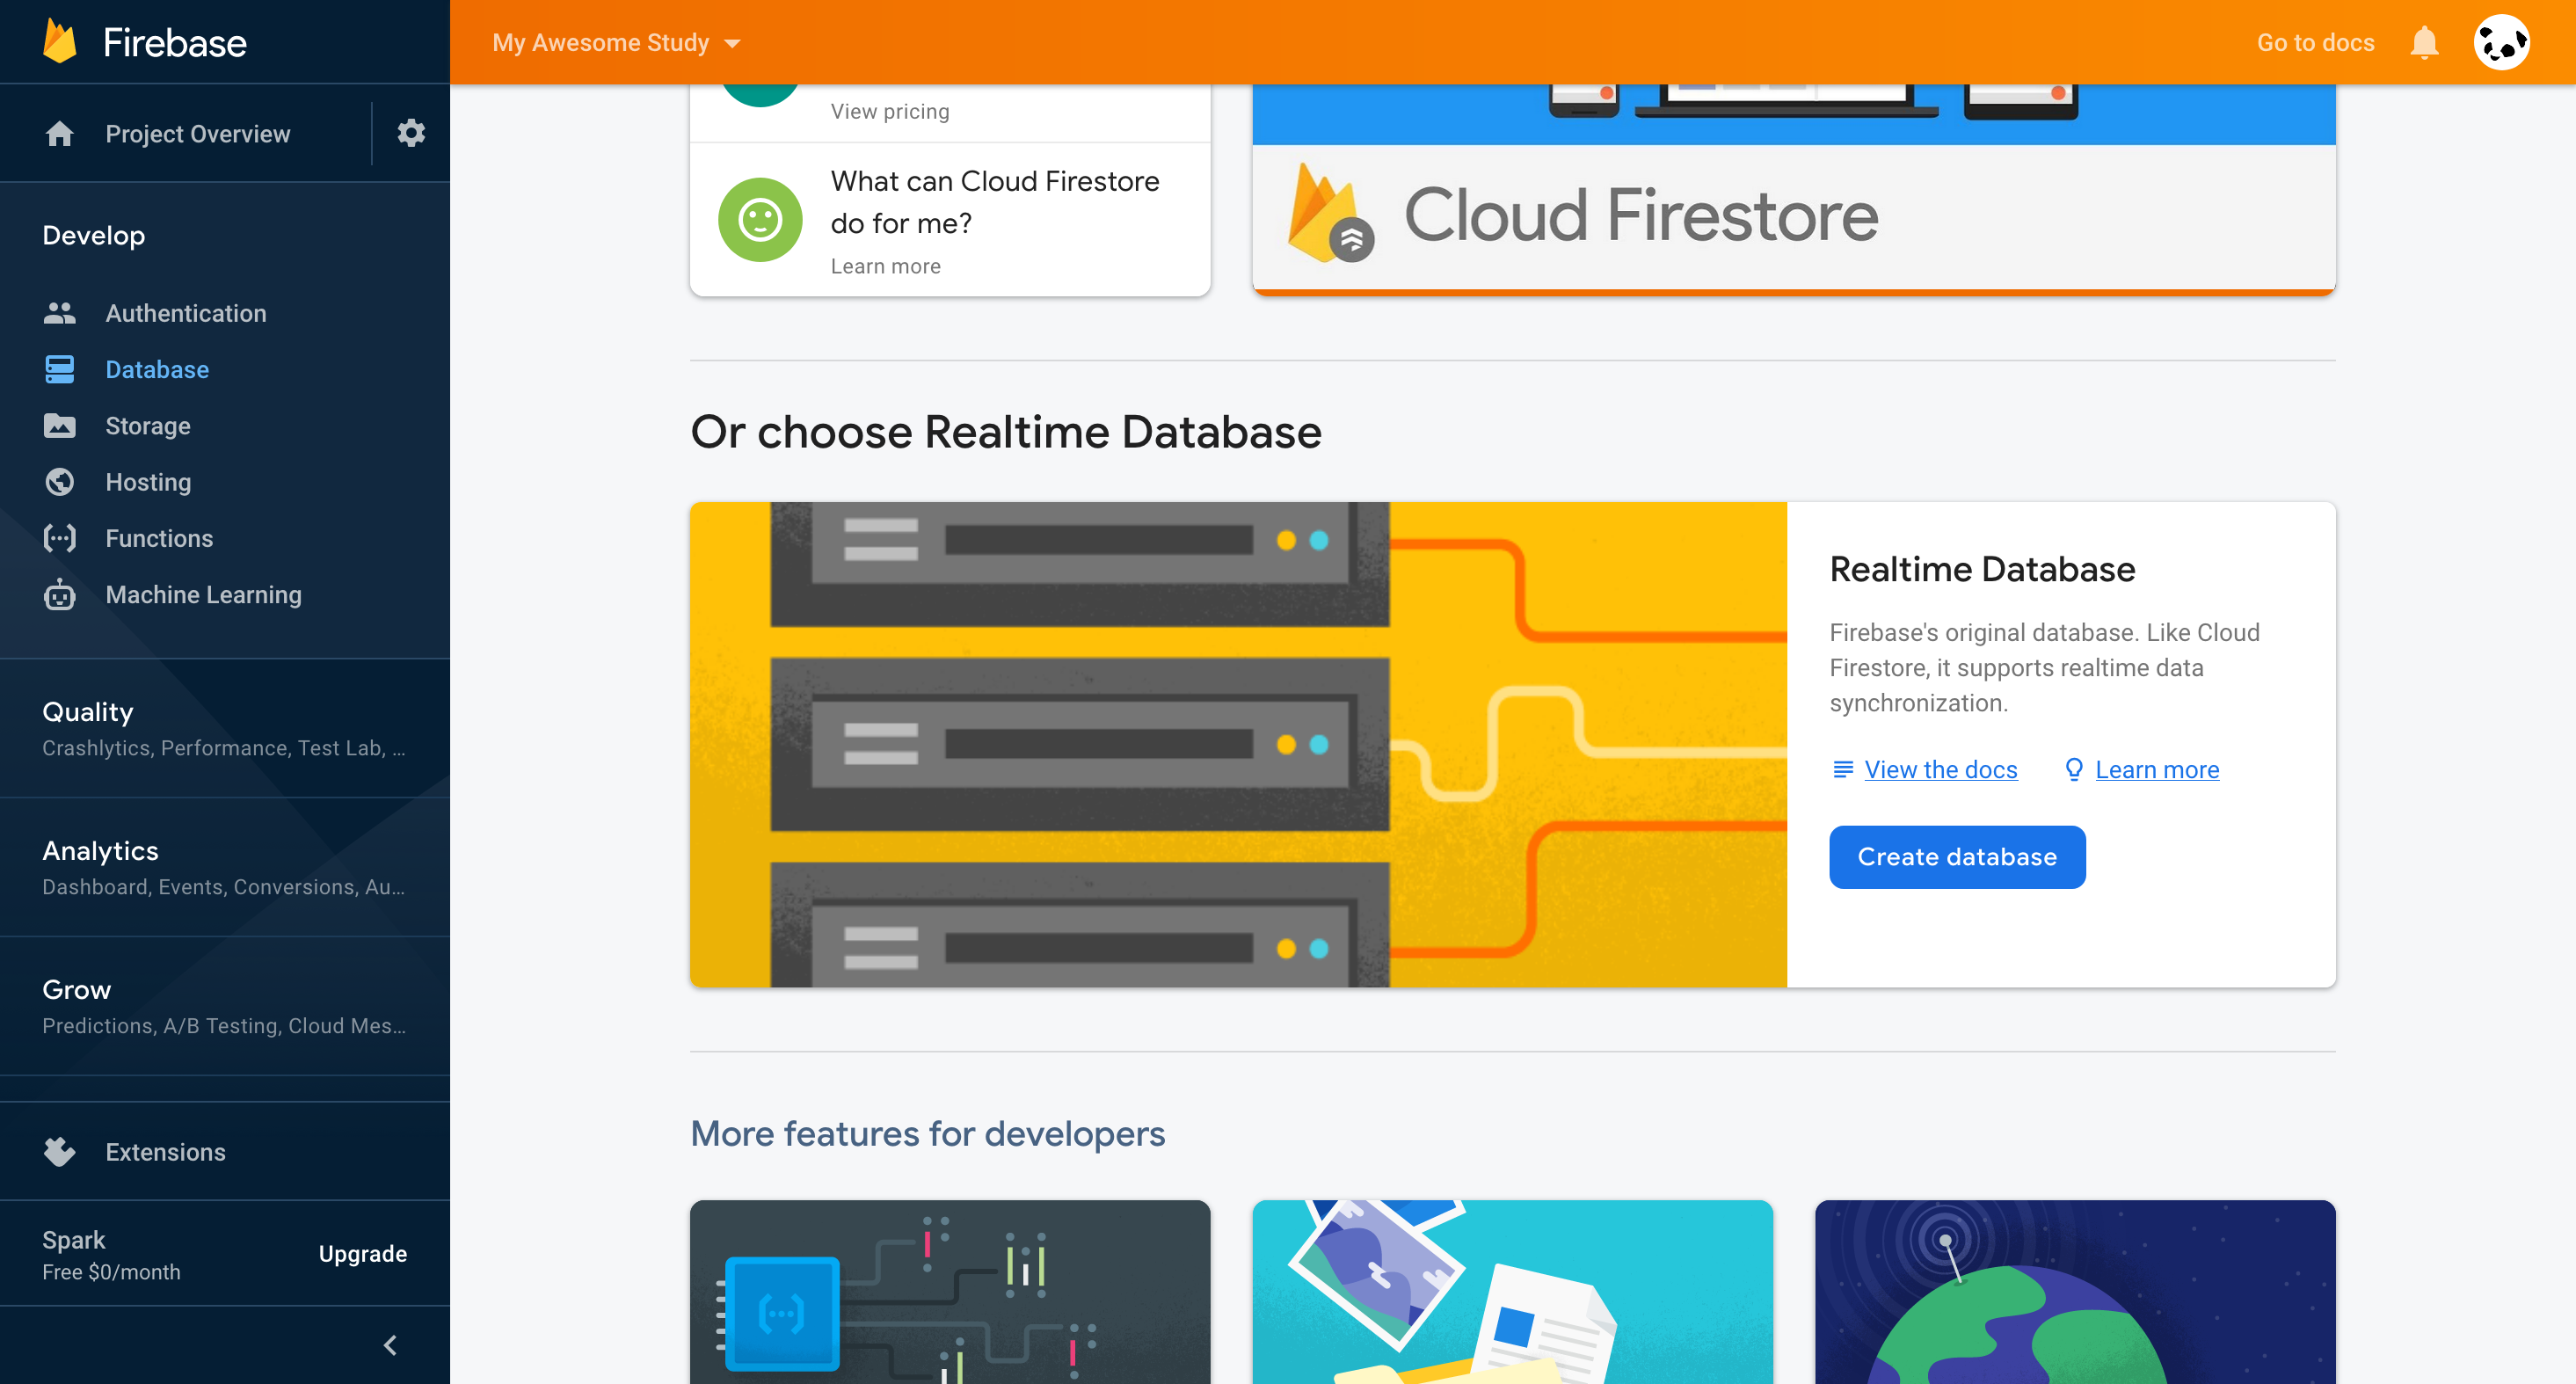
Select “Start in locked mode”.
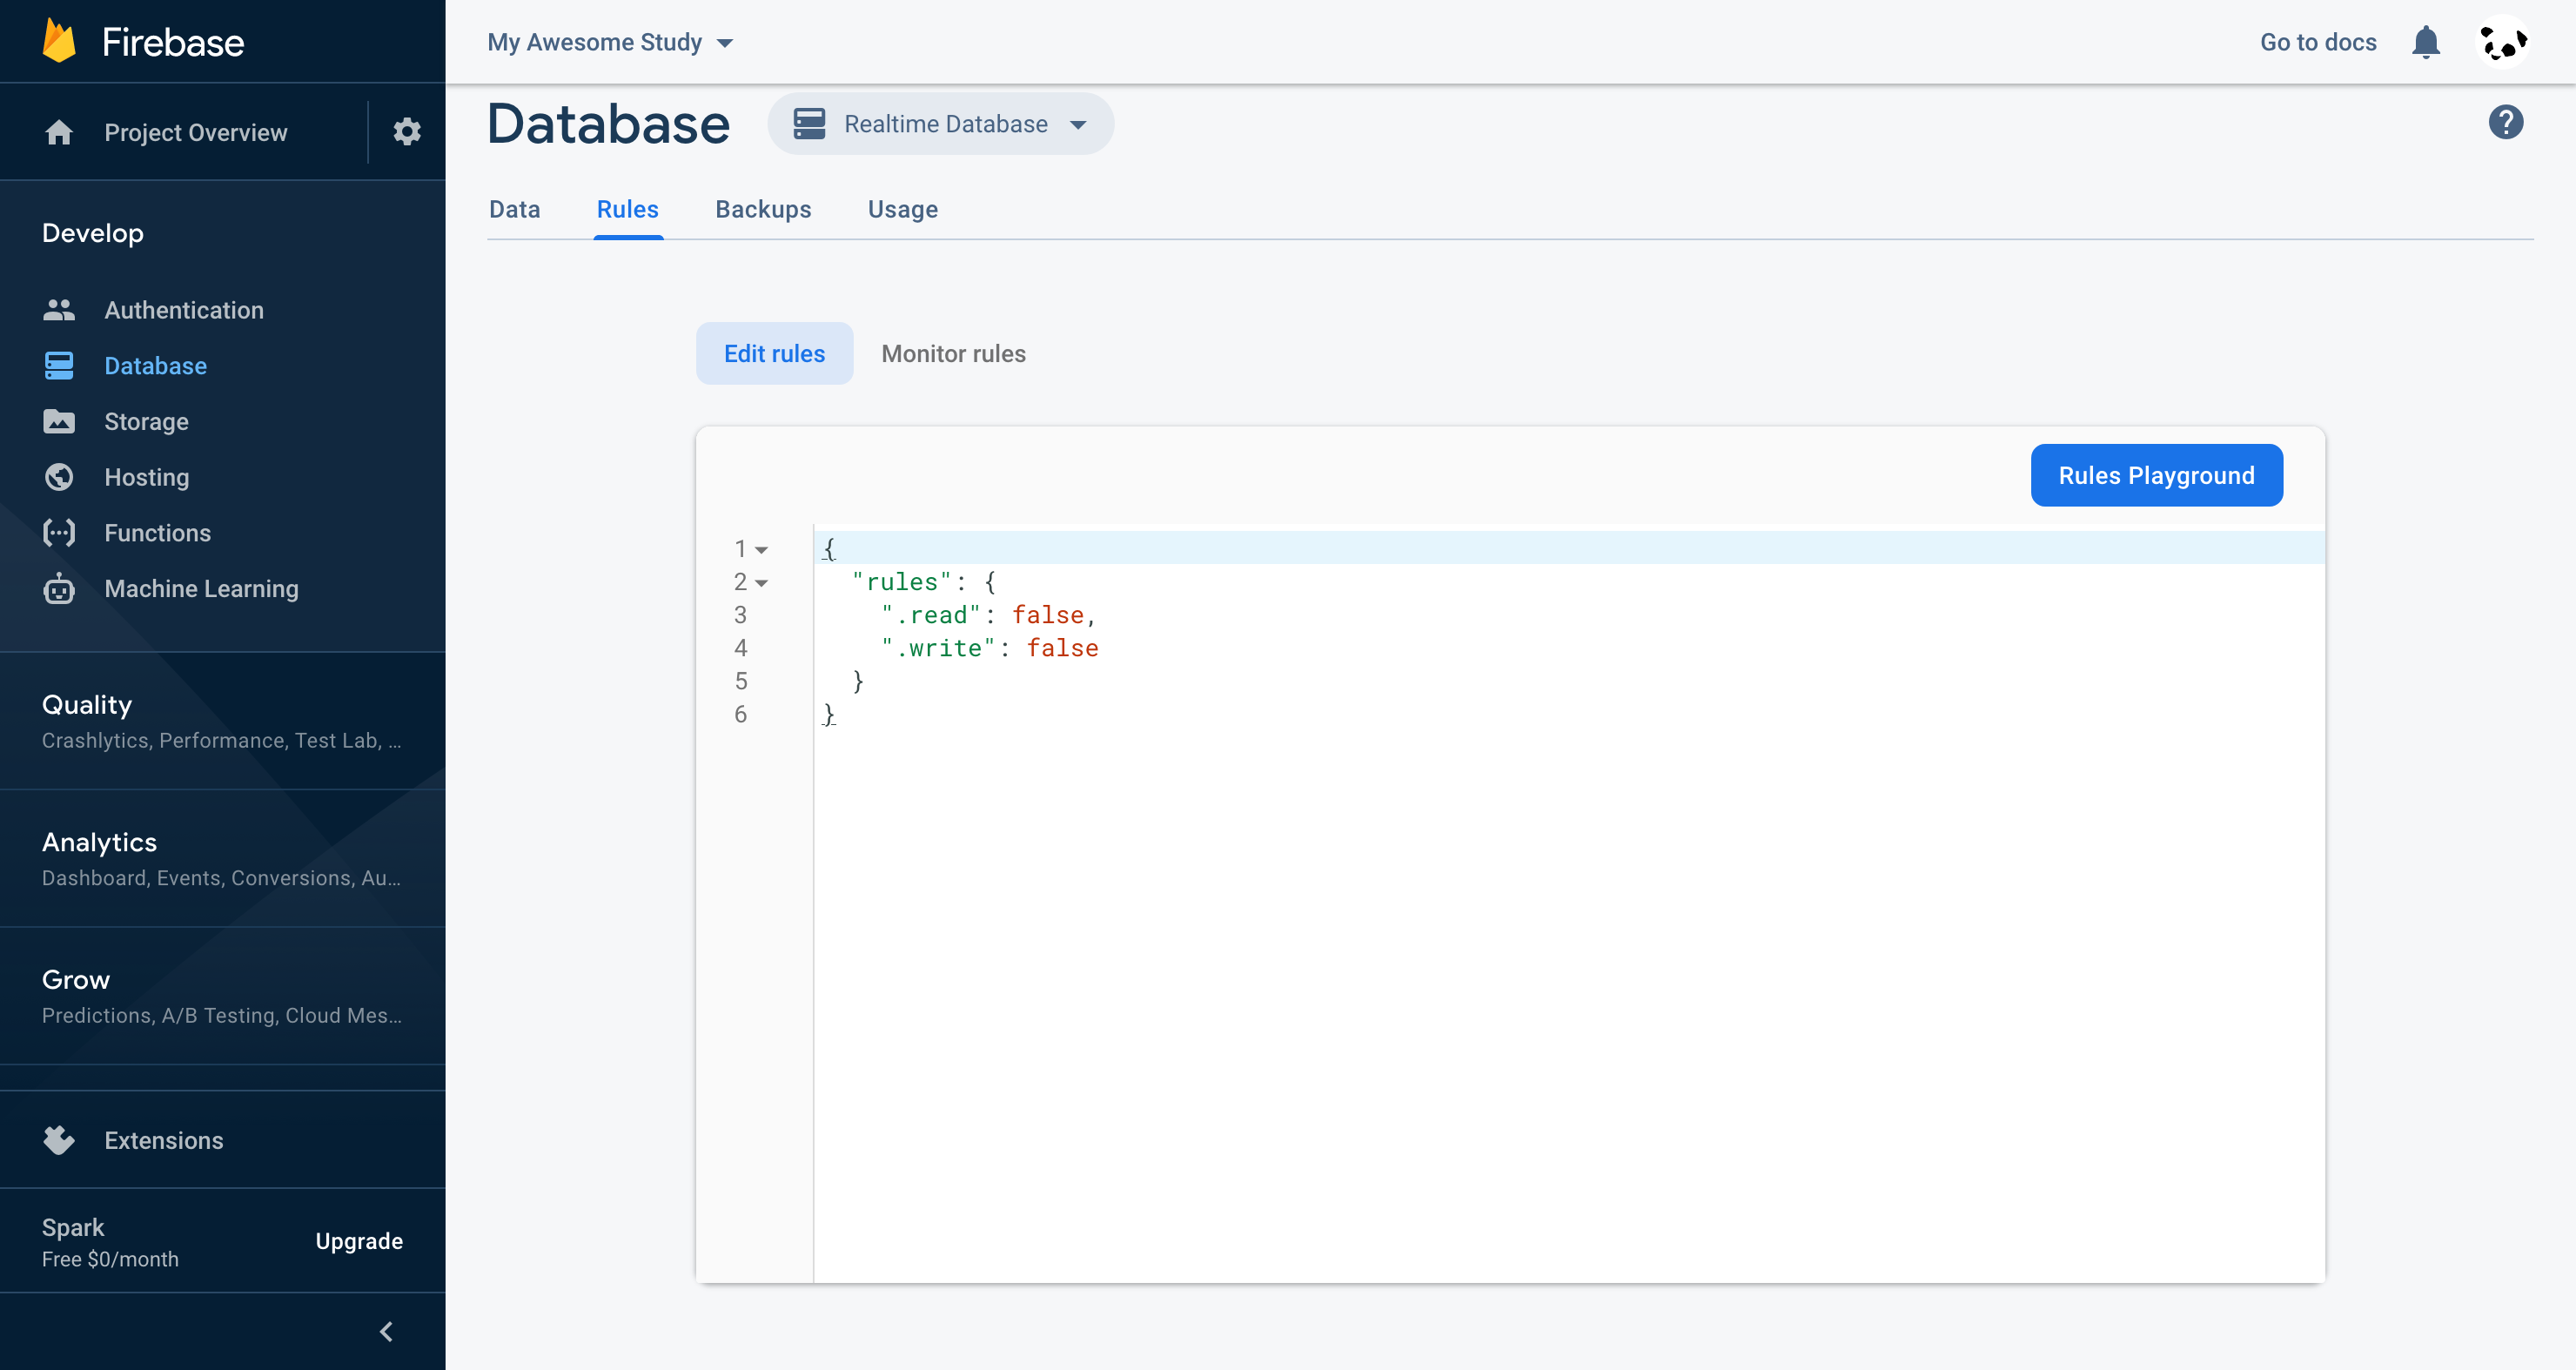
Navigate to the “Rules” tab.
Paste the following code into the text box (replacing the existing code) and click “Publish”.
{
  "rules": {
    // We don't allow any read for now, but in the future we probably need to use it as we address https://github.com/wellping/wellping/issues/10.
    ".read": "false",
    "users": {
      "$username": {
        // The user are only allowed to read from and write to their own entry.
        // The user must have a fictional verified email address `[uid]@user.wellpingssnl`.
        // See `MARK: FIREBASE_AUTH_VERIFIED_FICTIONAL_EMAIL_NOTE`.
        ".read": "auth.uid === $username && auth.token.email === auth.uid + '@user.wellpingssnl' && auth.token.email_verified === true",
        ".write": "auth.uid === $username && auth.token.email === auth.uid + '@user.wellpingssnl' && auth.token.email_verified === true"
      }
    }
  }
}
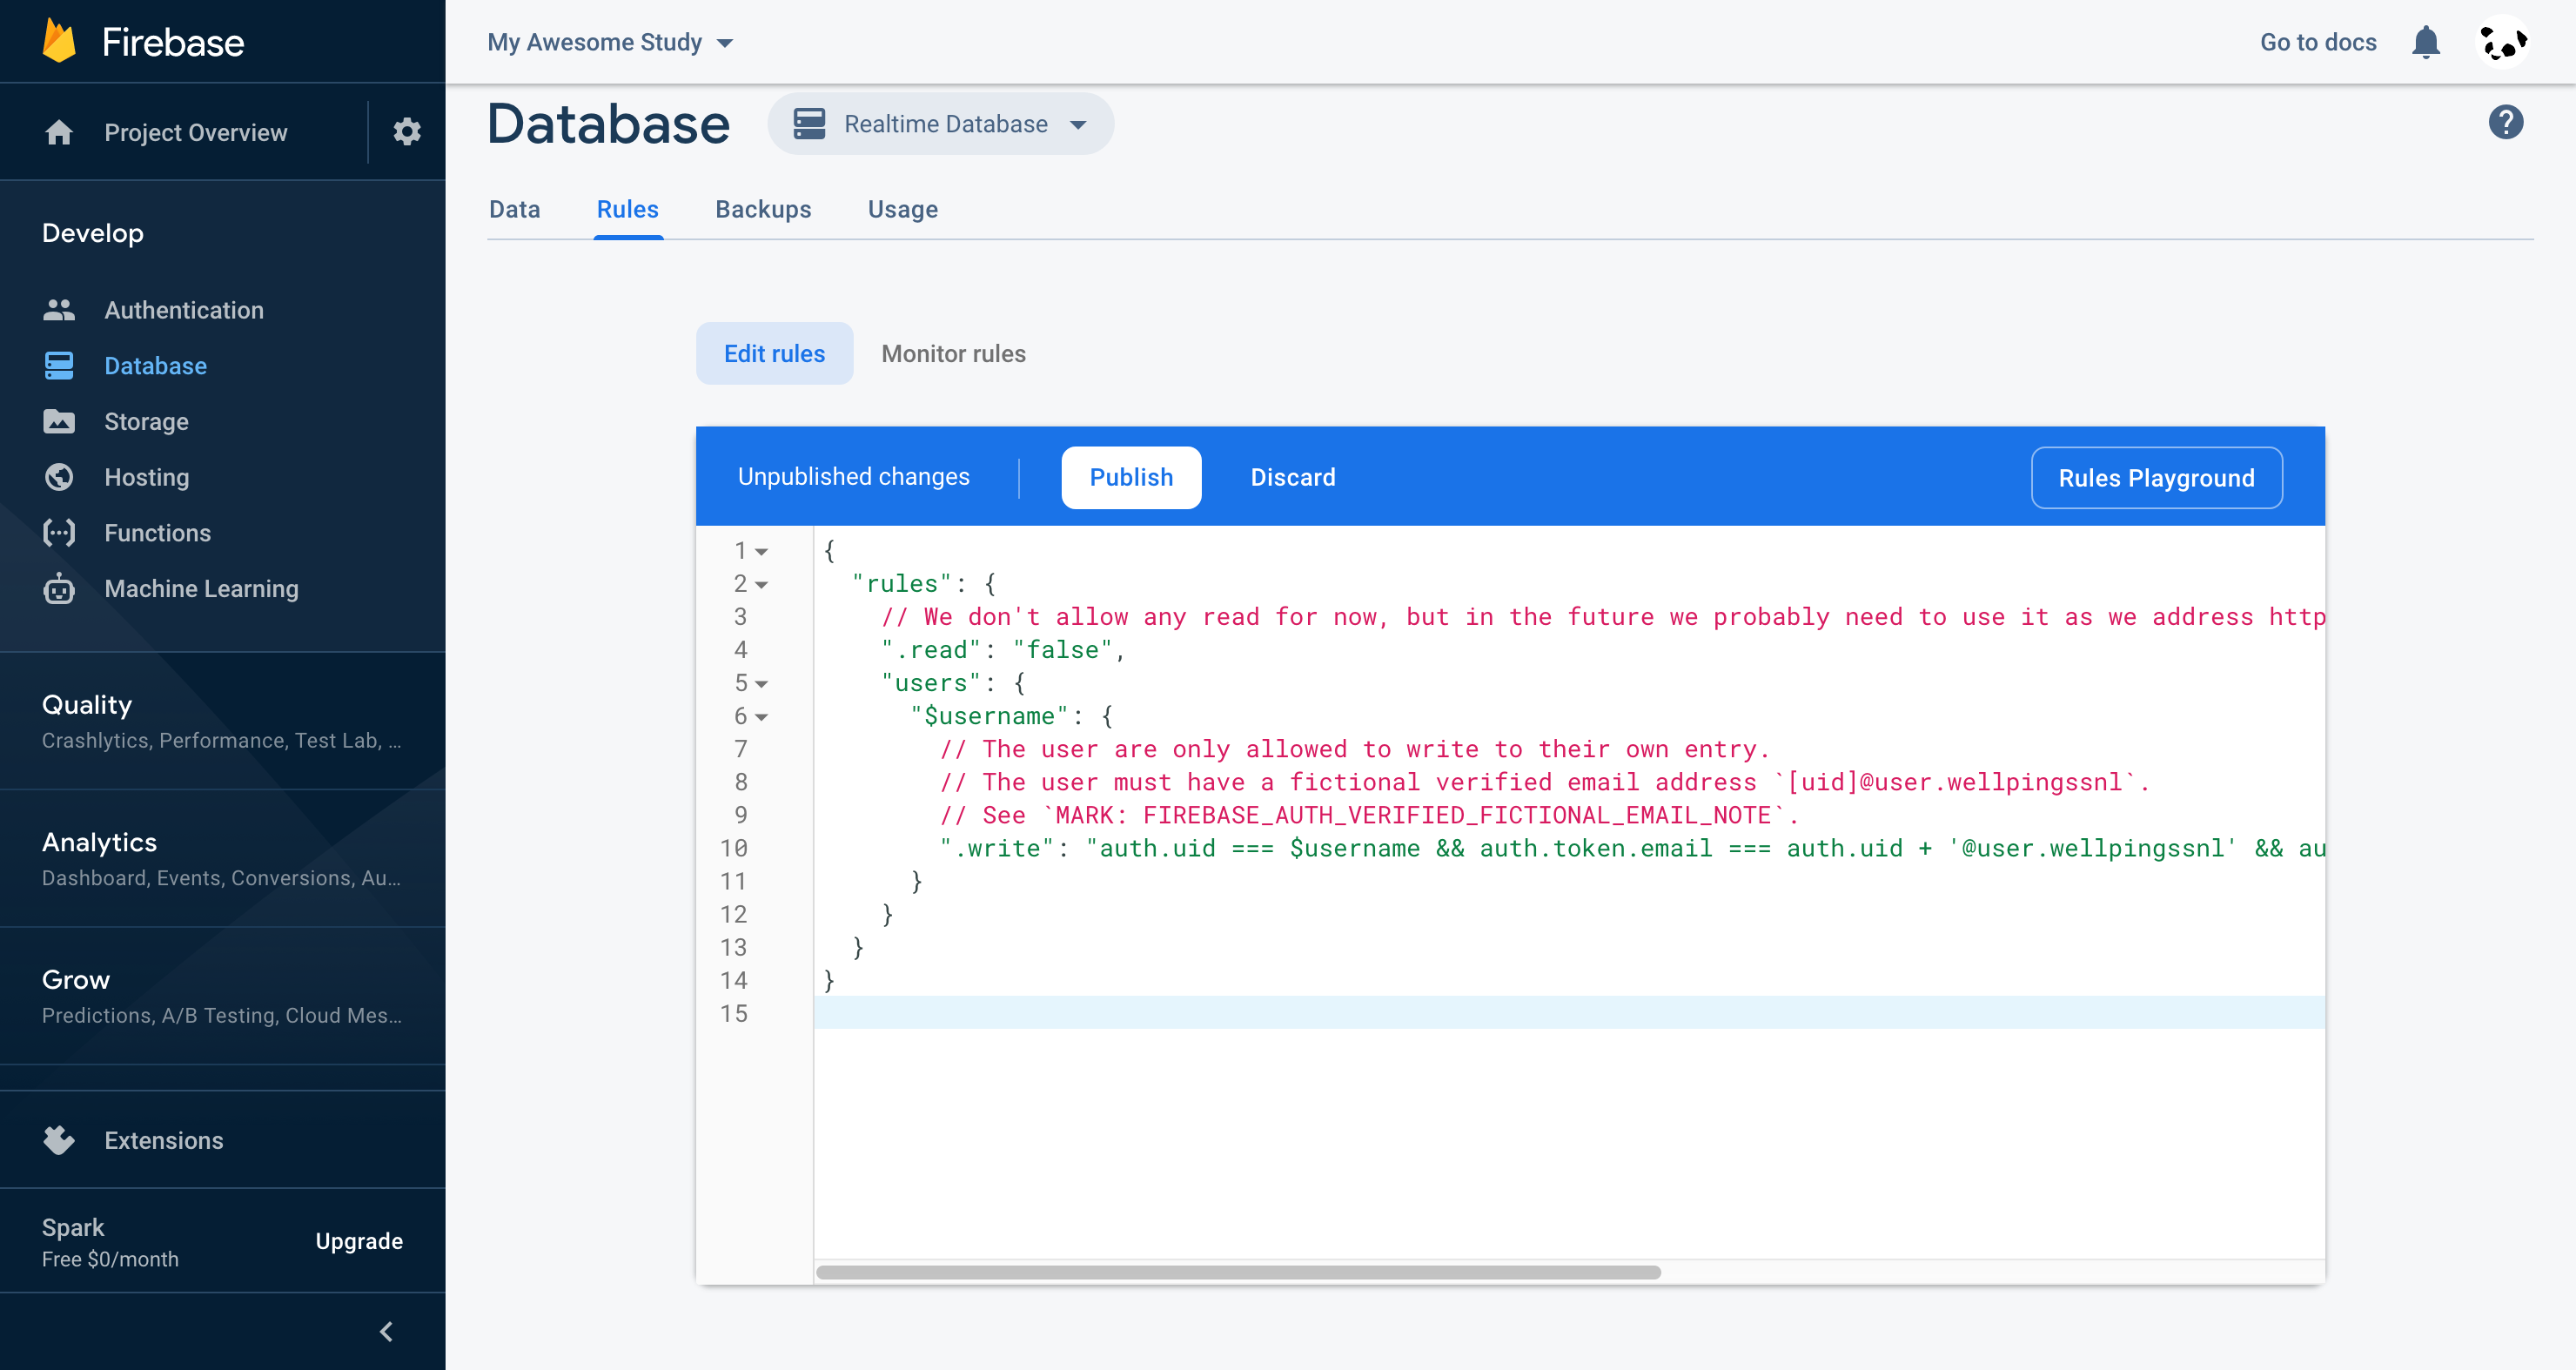
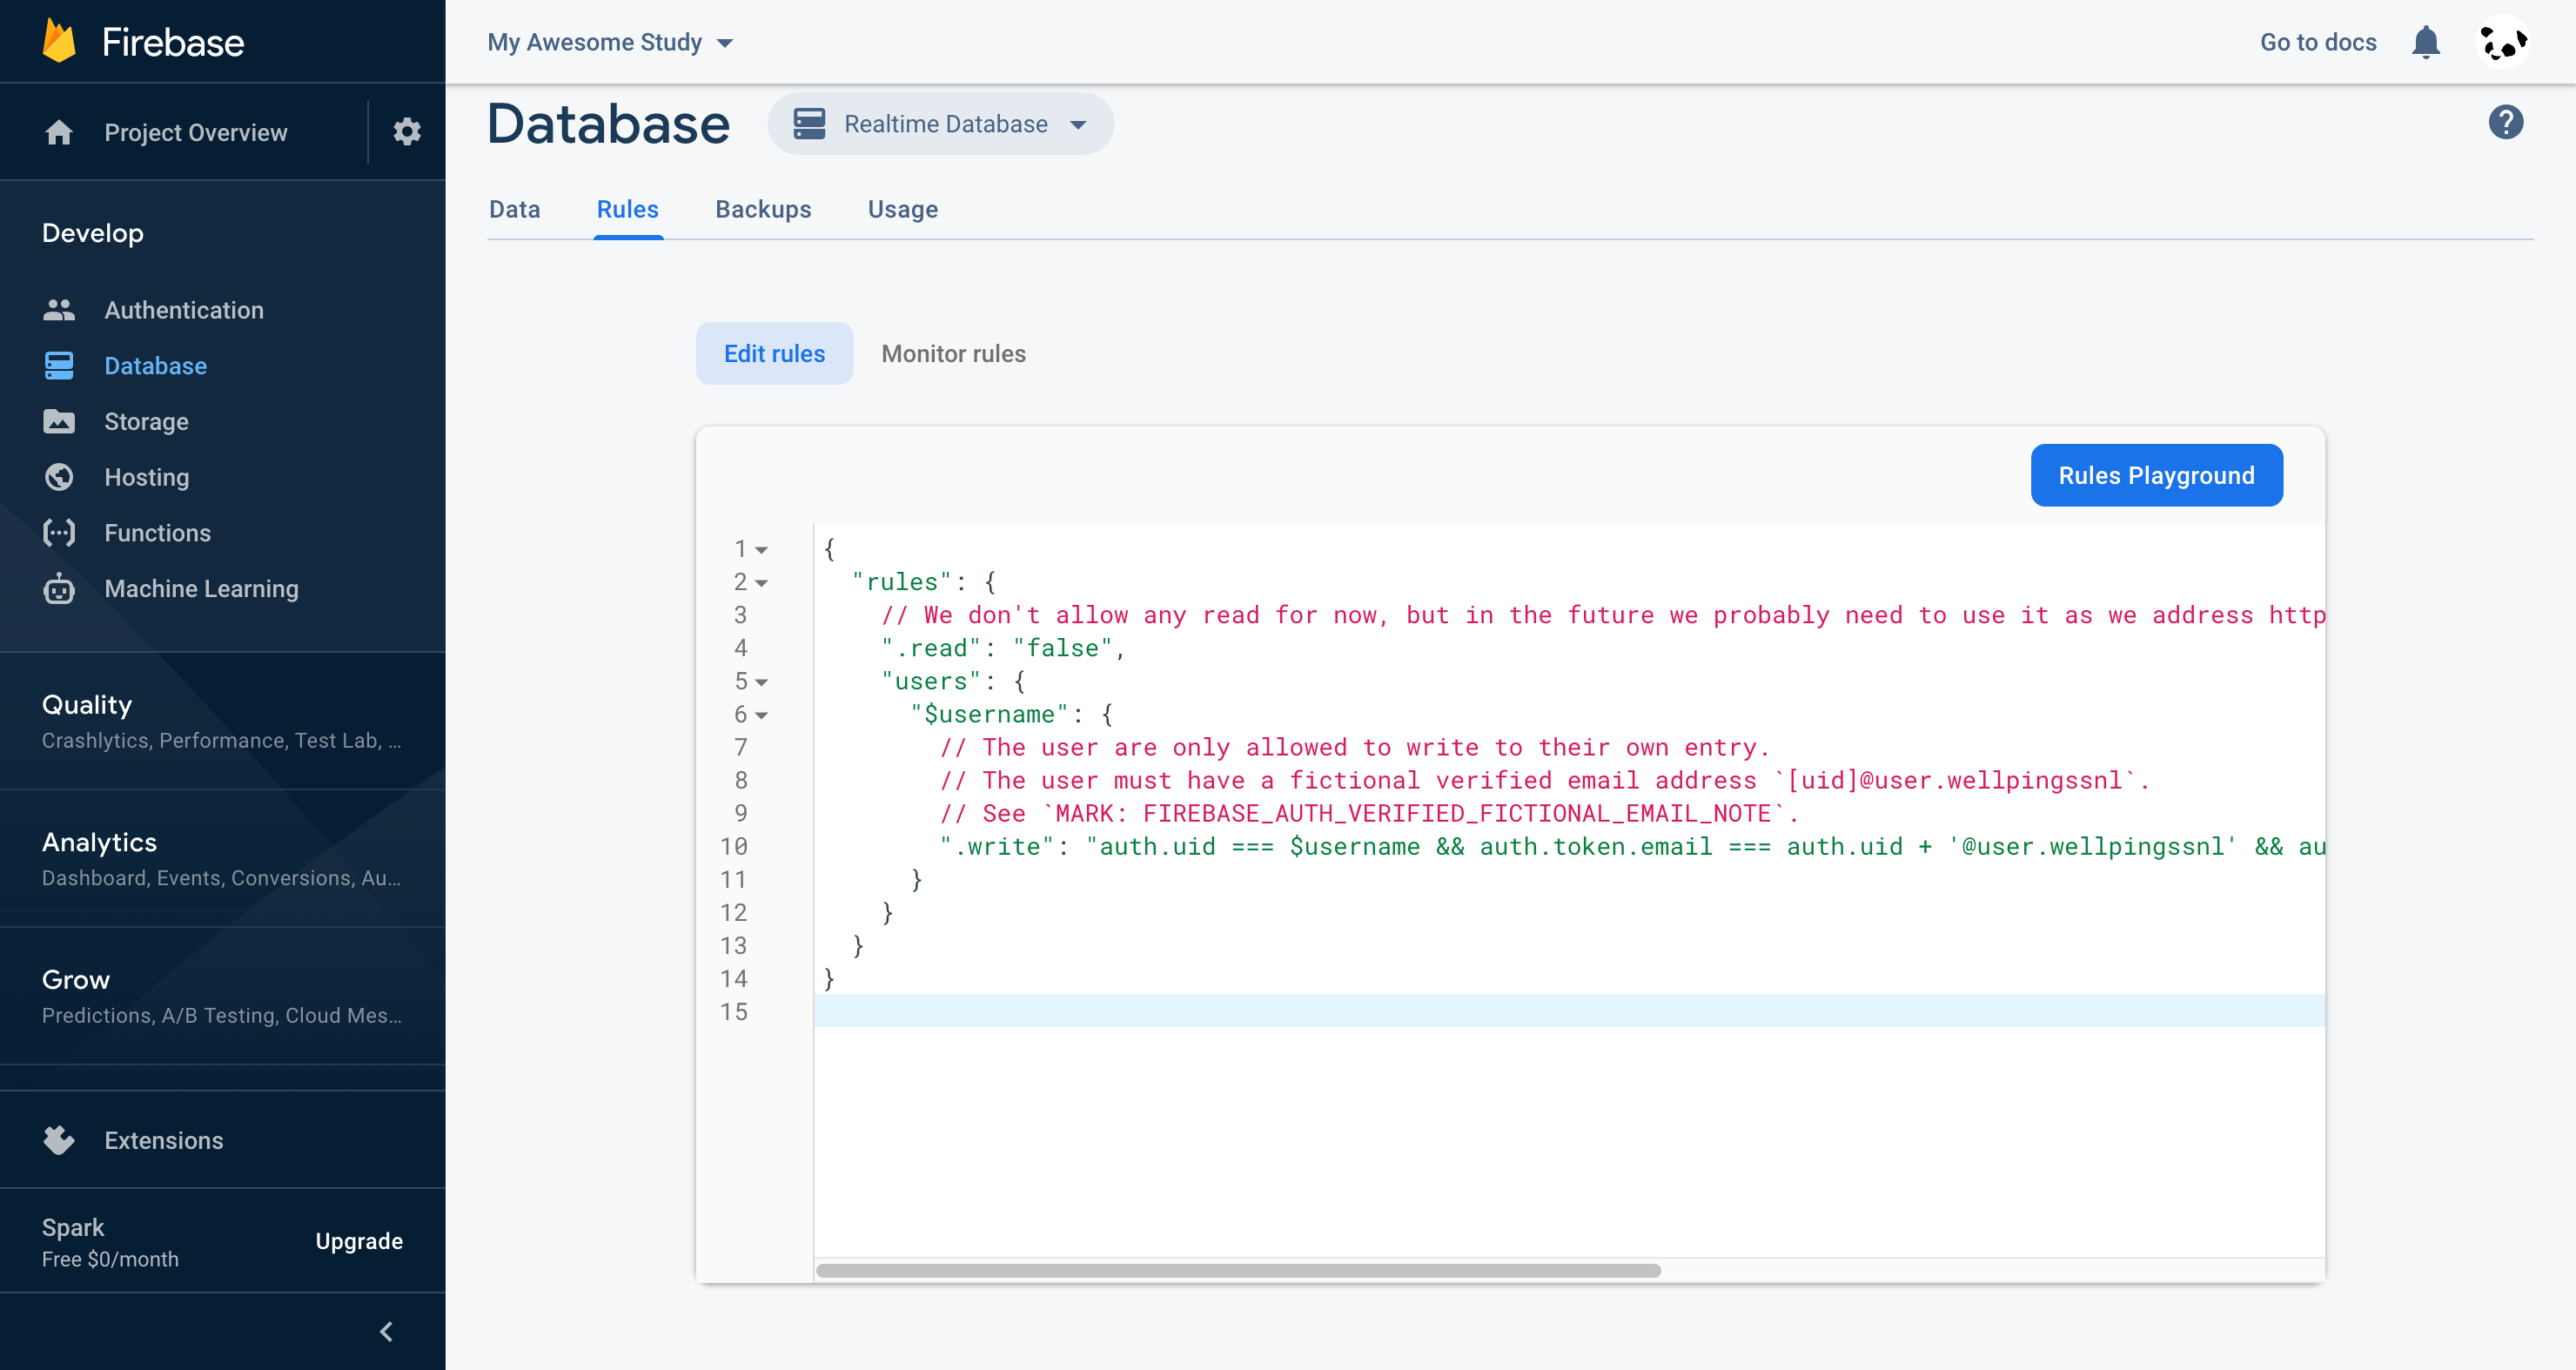
Good job! You have now successfully set up the Firebase Realtime Database!
4. Obtain Firebase Config
Finally, we also need to obtain a firebaseConfig so that Well Ping knows how to connect to your Firebase project.
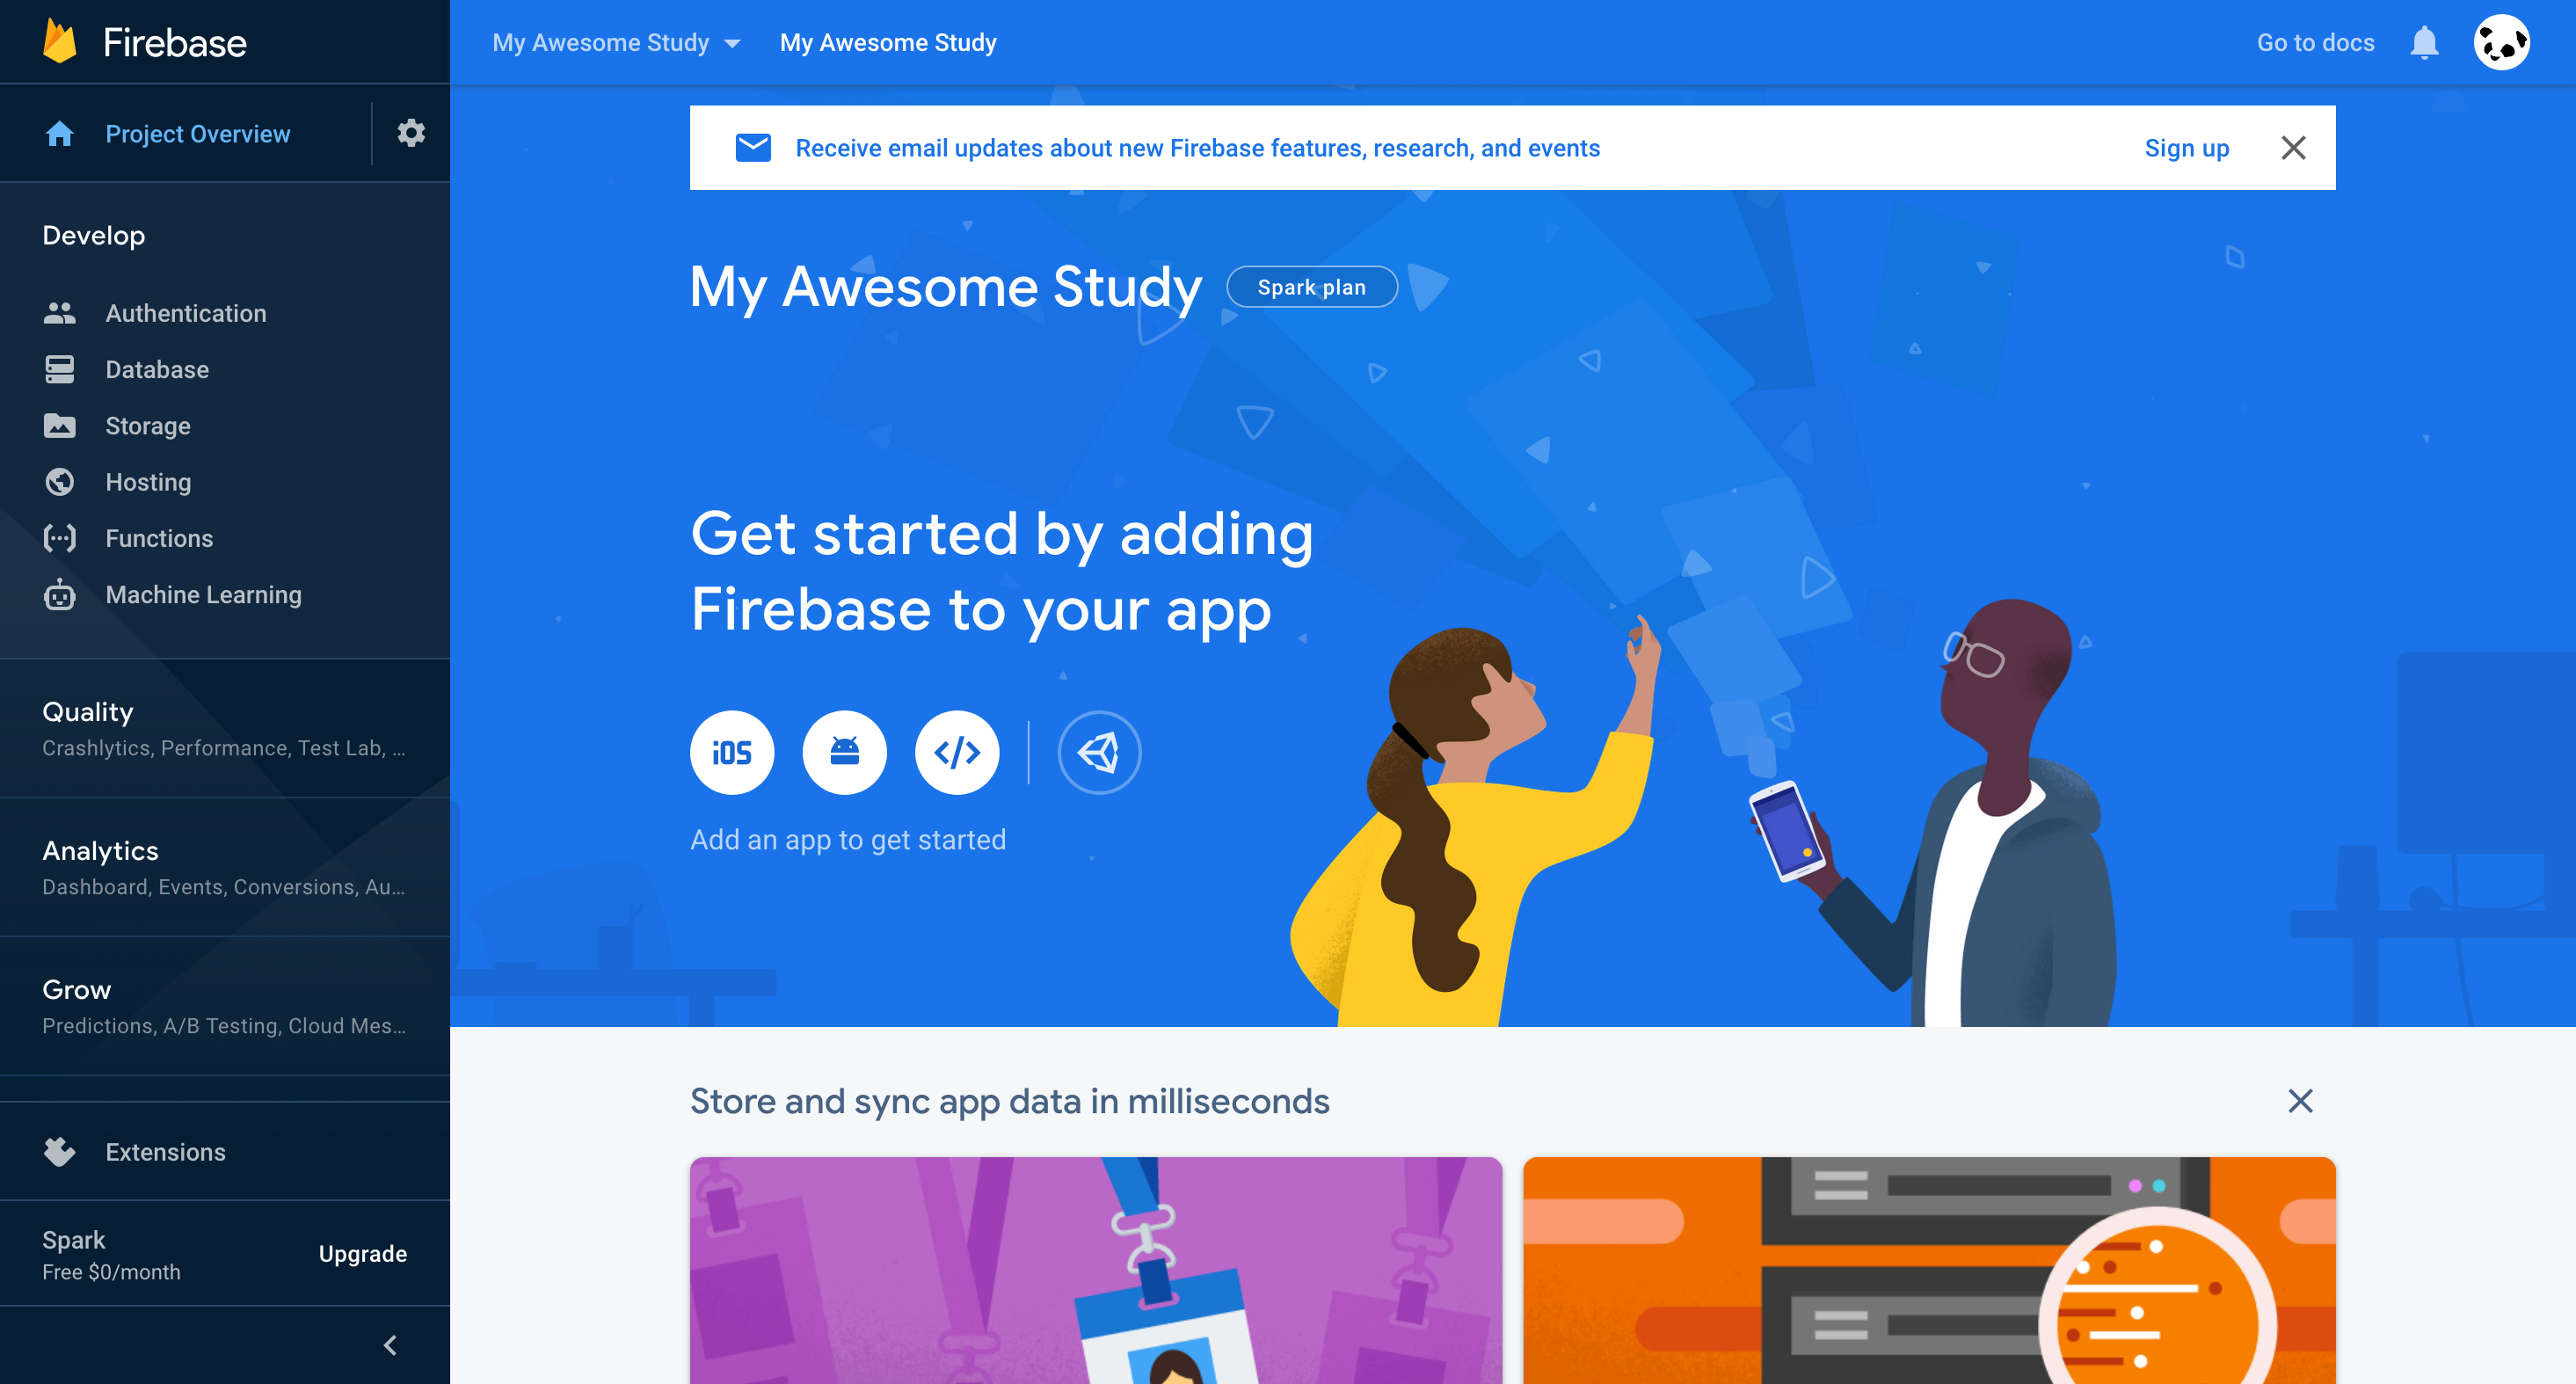
To do so, navgiate to “Project Overview” on the left.
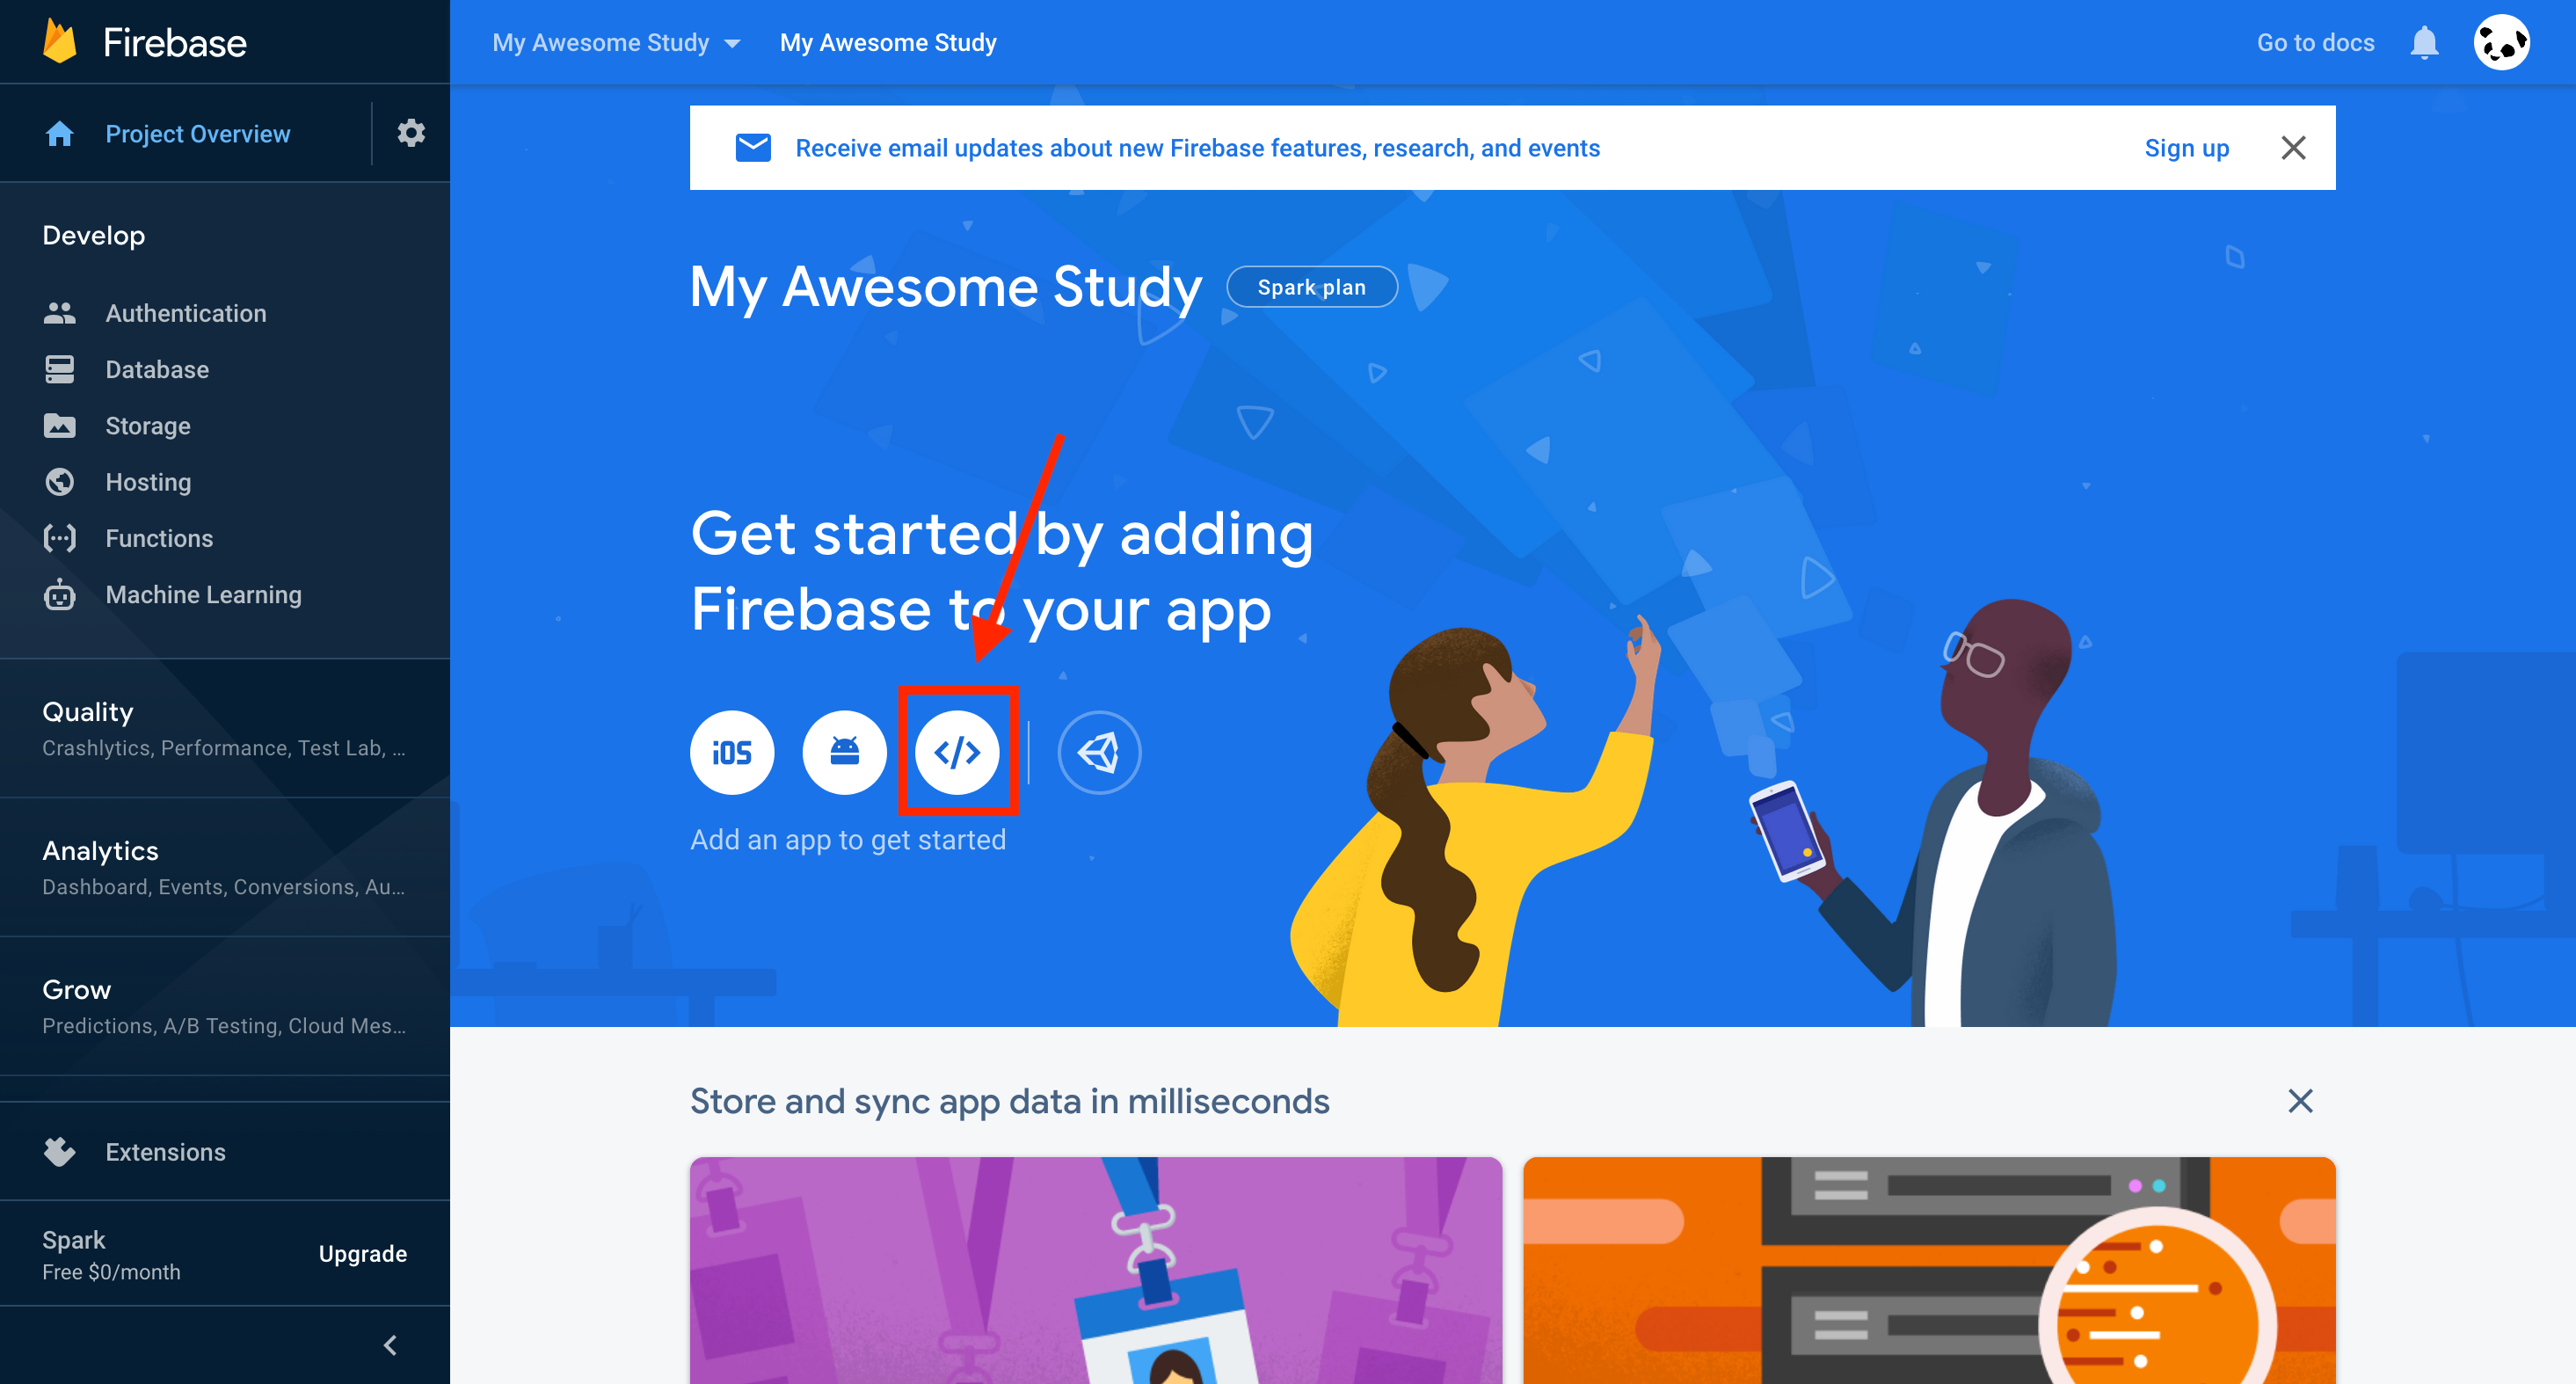
Click the </> symbol to create a new app. This is how Well Ping will connect to your Firebase project.
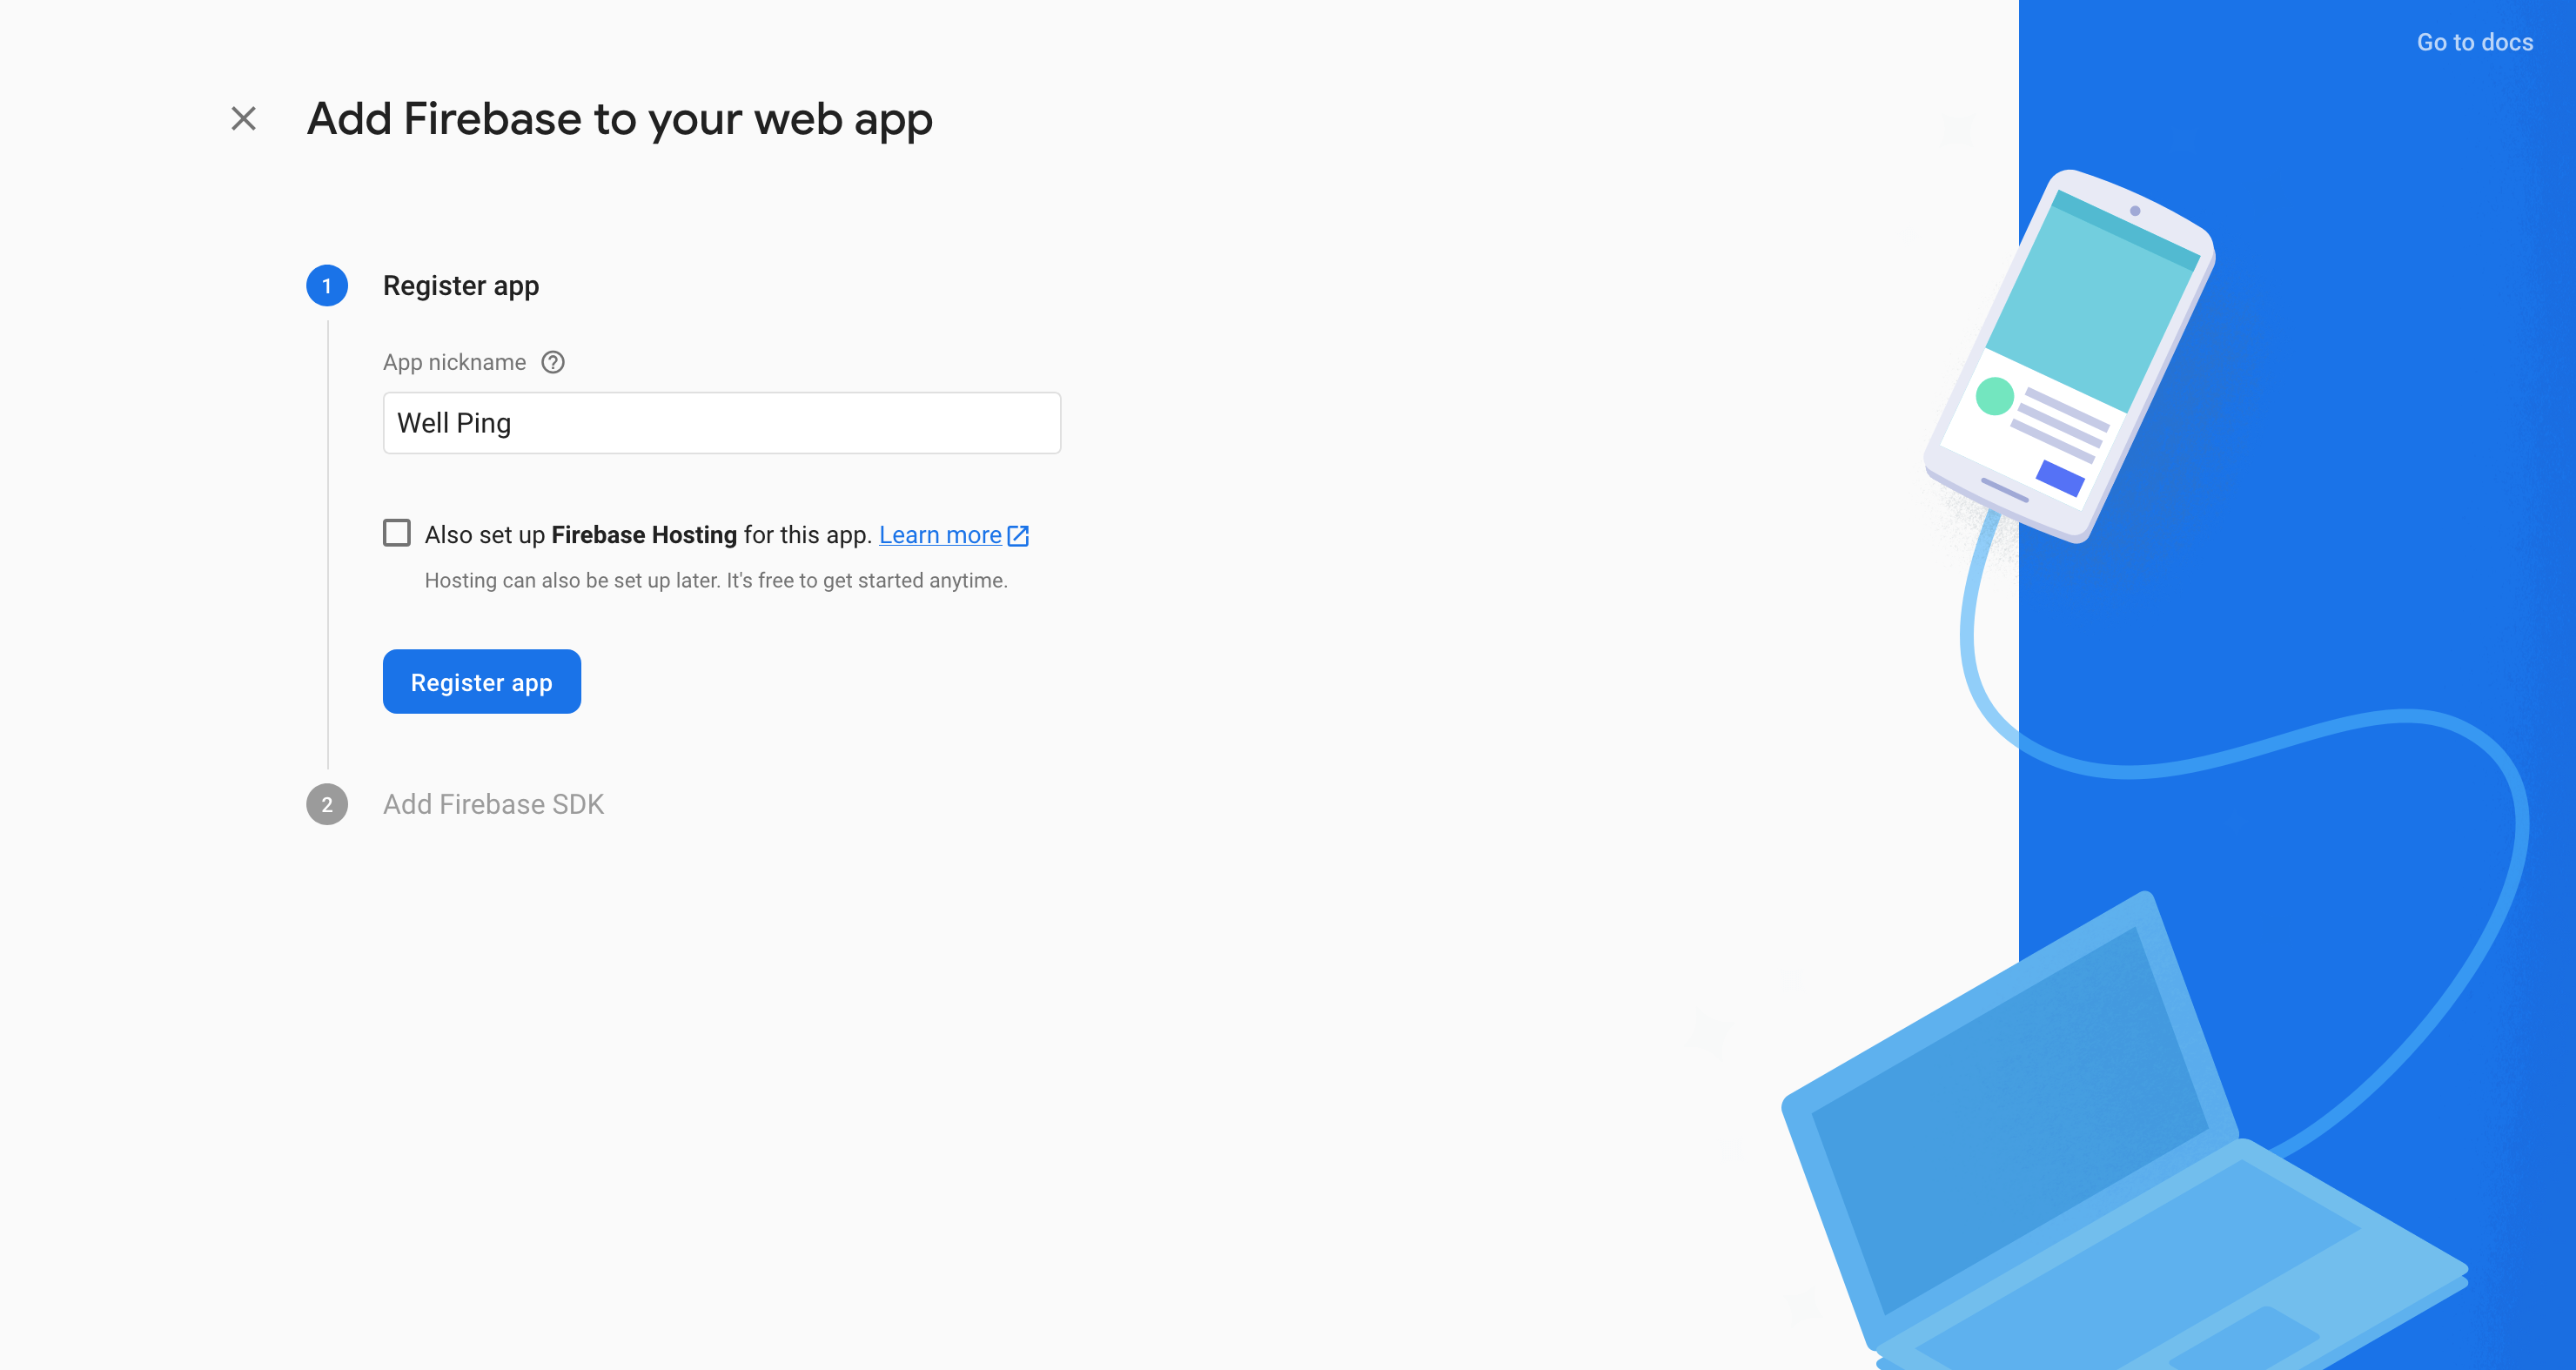
Type any nickname you like and click “Register app” (you do not have to set up Firebase Hosting).
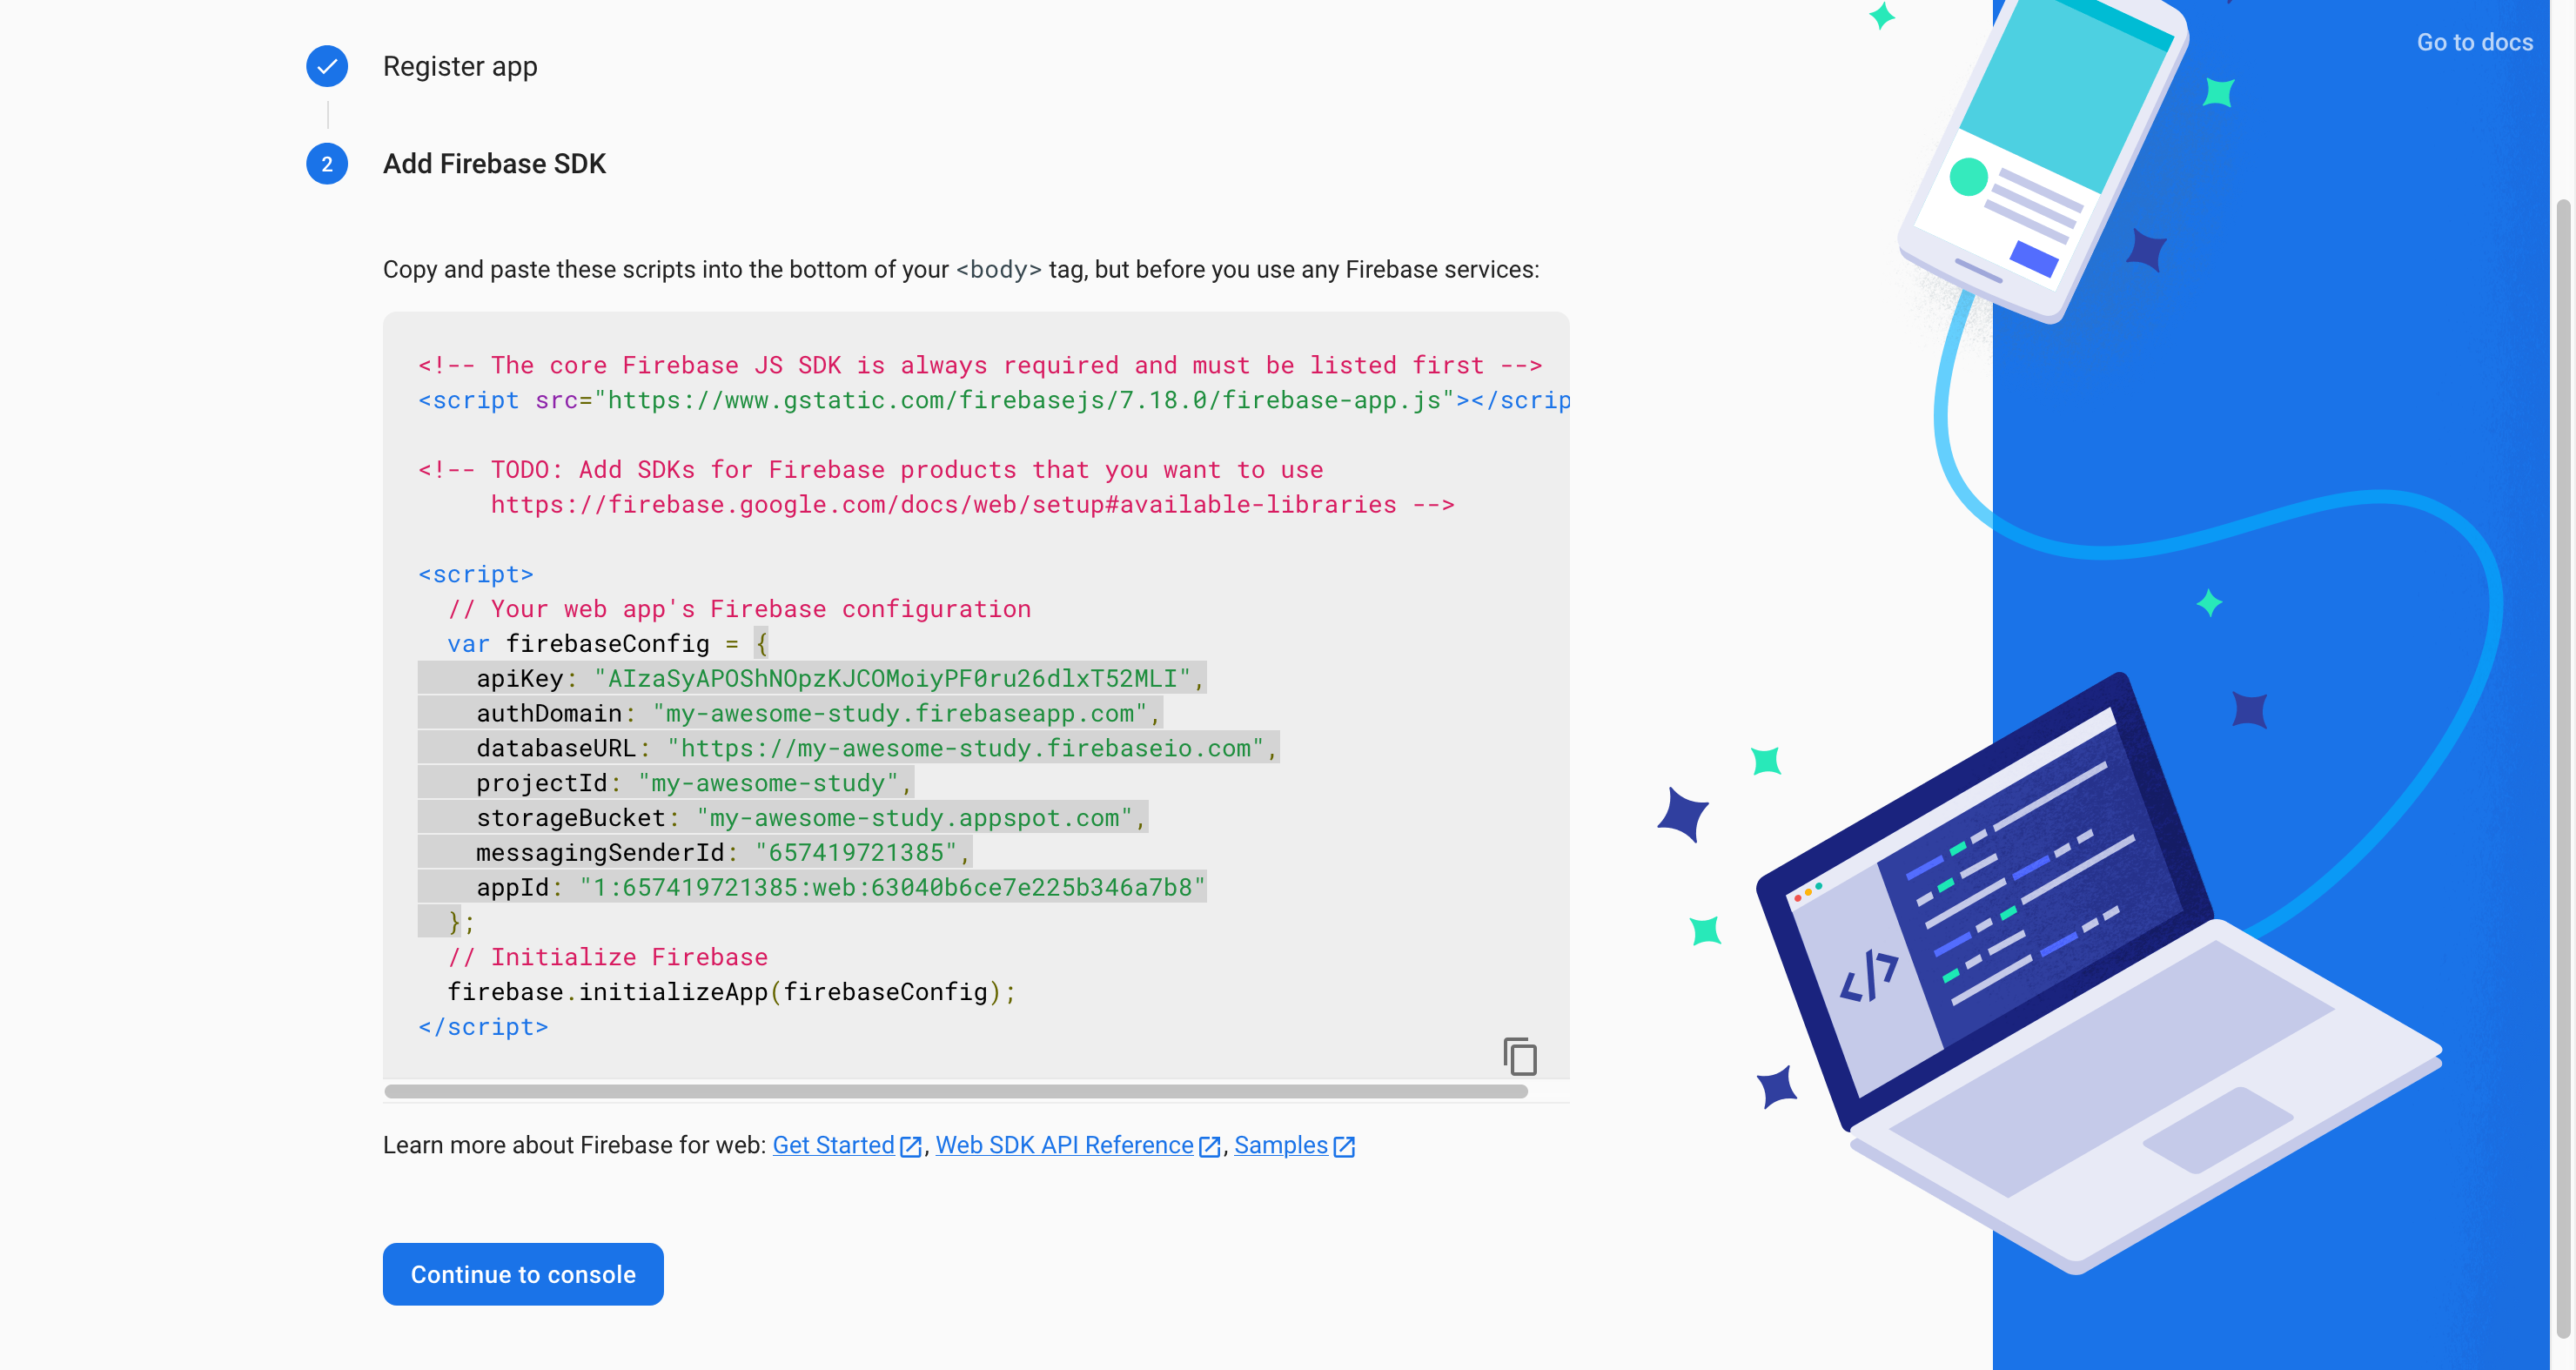
Locate var firebaseConfig. This object is your firebaseConfig object. For example, in the screenshot below, the firebaseConfig is:
{
    "apiKey": "AIzaSyAPOShNOpzKJCOMoiyPF0ru26dlxT52MLI",
    "authDomain": "my-awesome-study.firebaseapp.com",
    "databaseURL": "https://my-awesome-study.firebaseio.com",
    "projectId": "my-awesome-study",
    "storageBucket": "my-awesome-study.appspot.com",
    "messagingSenderId": "657419721385",
    "appId": "1:657419721385:web:63040b6ce7e225b346a7b8"
}
Include this Firebase config in your study file, and you are all done!
You can now try log in Well Ping with one of the account generated, complete some questions, and see if Firebase Realtime Database is storing the responses!